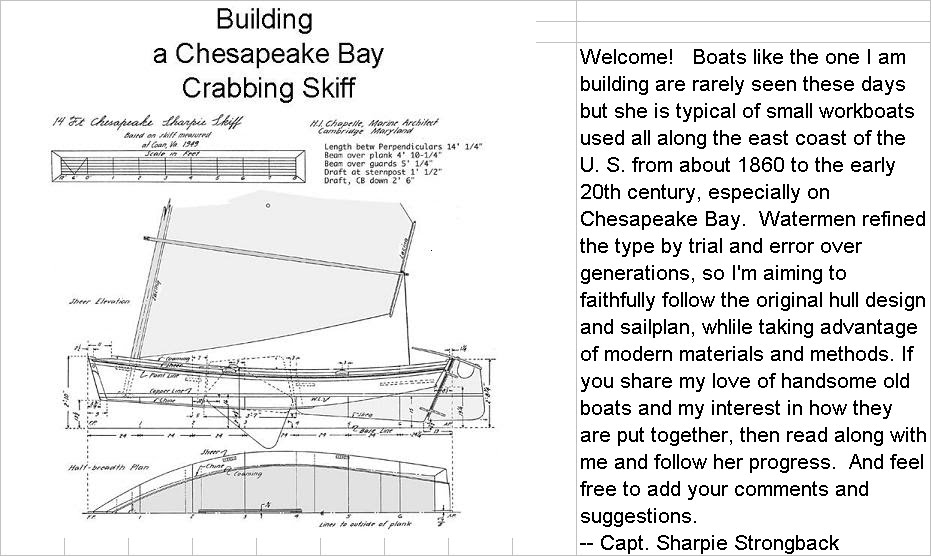
Since my last report I've been working on several parallel projects, all of which will converge at the assembly in the bow which supports the mast.
Last week I rough-shaped the mast, and on Sunday and Monday afternoons I got back to it, planing and sanding,
I used the electric plane to buzz off obvious high spots. I learned not to try to sand it round. The hand plane, used carefully, does that job best, followed by the orbital sander for smoothness. Chapelle's Boatbuilding says that sanding of a spar is done in a spiral. I couldn't think why to sand it that way, but I did anyway. Of course, Chapelle was writing before power sanders were widely used, but I sure wasn't going to sand it by hand. Eventually I got the mast down to the right size, round, and smooth. Not perfect, but close. I still need to make the other spars: the sprit and the little club, but they are stand-alone projects. The mast isn't; the boat has to be built to accommodate its size and shape. That's why I pushed on to finish the mast now. Remaining jobs to fit in are to fill the little knot holes, trim the ends, and put on several coats of varnish.
Based on the weight and dimensions of the Douglas fir mast timber before I tapered, rounded and sanded it, I had estimated that the finished spar would weigh 35 lbs. It came in under budget at 29.3 lbs. I am pleased to have it so light. I was also happy to find that the mast's center of gravity is low enough that I ought to be able to raise and step it alone without too much trouble. Interestingly, the offcuts from tapering the mast weigh 32 lbs., leaving unaccounted for about 20 lbs. of sawdust, planer shavings, and sanding dust.
While I was in sanding mode, I sanded all the deck frames, in preparation for reinstalling them.
In the meantime, while the inside of the boat was still free of obstructions like frames, thwarts and centerboard trunk, I gave the interior two sealer coats of penetrating epoxy, sanding between coats. After the second coat cured, I sanded it again and washed off any remaining epoxy blush with alcohol. The time spent on those sealers will repay itself in easier maintenance and longer life for the boat.
Today I worked on the forward thwart which will support the mast. It is a tricky job, and by luck, this month's Wooden Boat has a very helpful how-to article about making and fastening thwarts. I screwed in place the forward two frames on each side and measured where and how they need to be notched for the stringers which will support the thwart. And I measured again. And again. I took the frames off and carefully cut the notches with a Japanese pull saw.
I reassembled the frames and stringers, and they all fit. Despite all my measuring, the two stringers are a shade out of alignment with each other; one will need a slight shim. Another complication, which I knew about, is that the second frame on the port side is 1" forward of its designed position. I had to make that adjustment because otherwise the frame wouild attach right at the edge of a plywood butt strap. So the thwart, which will fit evenly between the frames on the starboard side, will have to be notched on the port side to fit around the frame there. Just a little extra work; strength won't be compromised.
Next I will make a pattern for the thwart as instructed by the magazine article, and use the pattern to make the thwart.
The plans call for a thwart 7" wide and 1 1/4" thick. I used the thickness planer to thin down a yellow pine 2x8 to 1 1/4", and I'll rip the width down to 7". The center of the after edge of the thwart will have a half circle cut out to fit the forward half of the mast. The mast will be held in place against the thwart by a removable clamp. But because the thwart will wedge under the sheer clamp, it can't be installed downward between the frames. It will need to be installed with the two after frames temporarily removed. Then the whole business will be screwed and epoxied together.
Once the mast thwart is in place, I can figure exactly where to position the mast step so that the mast has the right rake. After all those pieces are permanently in, there will still be room up in the bow to seal and paint everything before the deck goes on. Of course, there are two other thwarts to make, and all the other frames to fasten, as well.
I received an email a few days ago from one of the group in Crystal River which built a boat to the same design earlier this year. He reports that their boat "sails like a dream." That whets my appetite for sailing my boat, but I have a long way to go. It's good I also enjoy the building of her.
Tuesday, August 31, 2010
Subscribe to:
Post Comments (Atom)


No comments:
Post a Comment