Tuesday, August 31, 2010

Finishing the Mast and Starting on the Interior

Since my last report I've been working on several parallel projects, all of which will converge at the assembly in the bow which supports the mast.

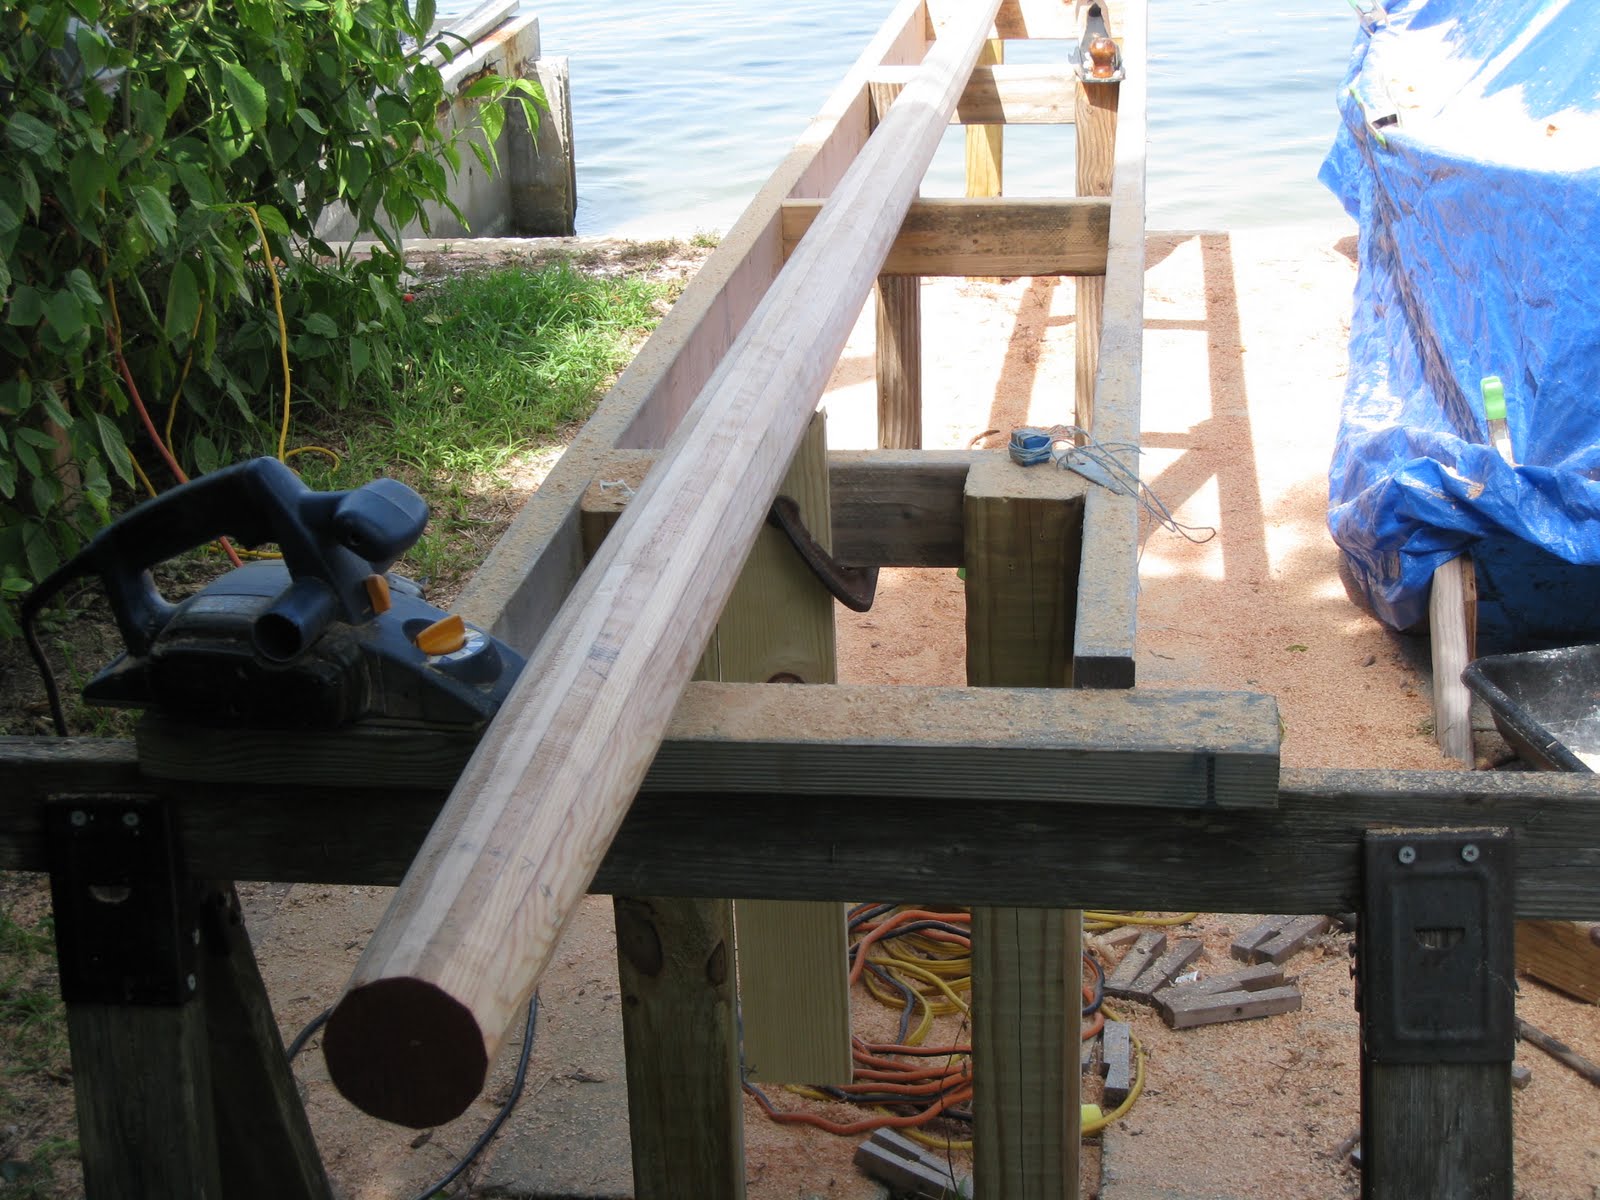
Last week I rough-shaped the mast, and on Sunday and Monday afternoons I got back to it, planing and sanding, 


 I used the electric plane to buzz off obvious high spots. I learned not to try to sand it round. The hand plane, used carefully, does that job best, followed by the orbital sander for smoothness. Chapelle's Boatbuilding says that sanding of a spar is done in a spiral. I couldn't think why to sand it that way, but I did anyway. Of course, Chapelle was writing before power sanders were widely used, but I sure wasn't going to sand it by hand. Eventually I got the mast down to the right size, round, and smooth. Not perfect, but close. I still need to make the other spars: the sprit and the little club, but they are stand-alone projects. The mast isn't; the boat has to be built to accommodate its size and shape. That's why I pushed on to finish the mast now.  Remaining jobs to fit in are to fill the little knot holes, trim the ends, and put on several coats of varnish.

Based on the weight and dimensions of the Douglas fir mast timber before I tapered, rounded and sanded it, I had estimated that the finished spar would weigh 35 lbs.  It came in under budget at 29.3 lbs. I am pleased to have it so light. I was also happy to find that the mast's center of gravity is low enough that I ought to be able to raise and step it alone without too much trouble. Interestingly, the offcuts from tapering the mast weigh 32 lbs., leaving unaccounted for about 20 lbs. of sawdust, planer shavings, and sanding dust.

While I was in sanding mode, I sanded all the deck frames, in preparation for reinstalling them.

In the meantime, while the inside of the boat was still free of obstructions like frames, thwarts and centerboard trunk, I gave the interior two sealer coats of penetrating epoxy, sanding between coats. After the second coat cured, I sanded it again and washed off any remaining epoxy blush with alcohol. The time spent on those sealers will repay itself in easier maintenance and longer life for the boat.

Today I worked on the forward thwart which will support the mast. It is a tricky job, and by luck, this month's Wooden Boat has a very helpful how-to article about making and fastening thwarts. I screwed in place the forward two frames on each side and measured where and how they need to be notched for the stringers which will support the thwart. And I measured again. And again. I took the frames off and carefully cut the notches with a Japanese pull saw.


I reassembled the frames and stringers, and they all fit. Despite all my measuring, the two stringers are a shade out of alignment with each other; one will need a slight shim. Another complication, which I knew about, is that the second frame on the port side is 1" forward of its designed position. I had to make that adjustment because otherwise the frame wouild attach right at the edge of a plywood butt strap. So the thwart, which will fit evenly between the frames on the starboard side, will have to be notched on the port side to fit around the frame there. Just a little extra work; strength won't be compromised.

Next I will make a pattern for the thwart as instructed by the magazine article, and use the pattern to make the thwart.

The plans call for a thwart 7" wide and 1 1/4" thick. I used the thickness planer to thin down a yellow pine 2x8 to 1 1/4", and I'll rip the width down to 7". The center of the after edge of the thwart will have a half circle cut out to fit the forward half of the mast. The mast will be held in place against the thwart by a removable clamp. But because the thwart will wedge under the sheer clamp, it can't be installed downward between the frames. It will need to be installed with the two after frames temporarily removed. Then the whole business will be screwed and epoxied together.

Once the mast thwart is in place, I can figure exactly where to position the mast step so that the mast has the right rake. After all those pieces are permanently in, there will still be room up in the bow to seal and paint everything before the deck goes on.  Of course, there are two other thwarts to make, and all the other frames to fasten, as well.

I received an email a few days ago from one of the group in Crystal River which built a boat to the same design earlier this year. He reports that their boat "sails like a dream." That whets my appetite for sailing my boat, but I have a long way to go. It's good I also enjoy the building of her.

Wednesday, August 25, 2010

Finishing the Deck Frames

It's a good thing I set up a cover over the work site.  I did it to provide shade, but the sun has hardly shown itself for the last four days- an unusual stretch of rain.  Because of the cover, I've still been able to work on the boat and keep myself, the tools, and the project dry except when the wind blows.

There are 13 deck frames on each side. The first step after cutting each piece to length was to rip the edge which is to lie along the side, at the angle between the boat's side and the centerline. That way the frame will lie perpendicular to the centerline. That job was quick and easy.


The tricky part of the outside edge was make accurate cutouts to fit around the chine and the sheer clamp. I tried several techniques, but what worked best was to make the cross cut with the jigsaw and whittle in the matching lengthwise angle using a jack knife.


As each piece was cut out on the outside, I tacked it in place and made additional cuts or whittles to make it fit. Then, using the gauge you can see here in the background, I marked top line on each frame, and pulled them all off and...


...cut the top edges to the marked line. Then I tacked them all back on to check the fit.The two frames on each side nearest the bow required special treatment.  If I continued to cut the same angle, there would be a ridge down the middle of the deck forward of the mast where the deck goes all the way across, instead of an arc.  So I marked and cut the forward-most frames for an arc and put a little arc in the next frames back to transition to the straight top enge of the remaining frames.


After the tops were all cut I laid a straight batten (a piece of screen mold, actually) along the inside edge of the deck on the starboard side, carefully aligned it for a fair curve, and marked the top edge where the frames needed to be cut for the inboard edge.


After repeating on the port side, I pulled the frames off again, cut the inboard edges, and tacked them back on. The inboard edge is plumb for the top couple of inches, where the coaming will fasten to the frame, then tapers down to nothing at the chine. Here is a look at the frames in their final form.


Finally, I pulled all the completed frame pieces off one last time and put them aside to be sanded. I put all the tools away and washed the inside of the boat. After several months of accumulated dirt, sawdust and mold were scrubbed away, I left it to dry in preparation for giving the inside its sealer coat of epoxy. That will be easy to do now before the thwarts and frames are permanently attached.

Thursday, August 19, 2010

Starting on the Deck Frames

After a couple of days of thinking, measuring, buying materials, and avoiding any actual work, I started on the deck frames.  They will be about 7" wide at the deck level, and taper down to nothing at the chine.  Structurally, they are to just support the deck, not hold the sides in place; the thwarts will do that.  Spaced every 12", there are a lot of frames to make, and no two will be quite alike. They will require good joiner work, which I'll have to learn on the job.

I bought nice planks of 1x8 clear white pine to make the frames. But I also bought a couple of cheap spruce planks to practice on. Today I got out my tools and had at it. Making a practice version of the aft-most frame on the port side, on the first try I cut an angle the wrong direction. The second effort was the right general shape, but I planed away too much bevel on the side, and it took over an hour to make. The third one was quicker and better, but not quite a good enough fit. And what is the cheap practice wood for if not for practice? The fourth copy was made easily and quickly, and with a little shaving and sanding it fit very well. I tacked it in place. Cuttng and fitting the next two frames was easy. Now I can go back and start for real, using the good wood. When they are all cut and fit I'll fix them in place with screws and epoxy. This part of the project worried me the whole three months I was away, but now I feel confident I'll be able to do a good job of it. In fact, there are so many of the frames to make, this may be an exception to the rule that I (1) only get so I can do a job just as it's finished, and (2) forget how before I ever have to do it again.


I have made one good improvement to the work area, spreading a tarp over two shade tents to make a shaded and protected cover to work under. I worked for several hours today in full Florida sun and heat without once thinking of Lawrence of Arabia.


Saturday, August 14, 2010

Turning a Timber into a Mast

Yesterday I bailed out after a short time outside in the hot sun.  If I keep doing that, I won't get much done until October, and then I'll be wanting to take camping and bike trips and sail.  So today I resolved to press on, hot or not, and made good progress.


The mast timber was already cut and planed to the right thickness and taper, but was still 4-sided.


Today I finished marking the cut lines to make it 8-sided, using my magic spar gauge. Using the circular saw set at 45 degrees, I cut off the 4 corners, leaving about 3/16" margin to finish with the plane. The picture is fuzzy because when I took the camera outside the temperature difference made the lens fog up immediately.


That gave me an 8-sided spar.  In this photograph, foreshortening makes it look like the spar comes to a point.  The actual taper is from a max of 3 1/4" down to 1 1/4" at the head. For the next step, making it 16-sided, I'd intended to do the job by eye, using the plane alone.  But the 8 siding had gone well, and I trusted my graphic skill more than my eye, so I carefully measured and marked lines to plane to.  It turns out that each face of a 16 sided polygon is .209 times the diamater.  A lot of measuring and marking, but it just took patience..At the thin end, small errors in marking made for unequal 16 sides, so for the last three feet I did do the job by eye.


After planing to the marks, here is the result, a tapered 16-sided spar.


Then I buzzed off each of the 16 edges with the plane set on its minimum depth.  It's ready to sand and finish, but that's for another day.

There are a couple of knots in the mast which worry me. Trimming the timber down didn't eliminate them.  Before I finish the spar I'll fill the gaps with epoxy and reinforce the spots with small patches of fiberglass cloth.  I hope that makes the mast strong enough. If it fails, I know how to make another.


Friday, August 13, 2010

Mad Dogs and Englishmen

Today's project was to turn the 4-sided mast into 8-sided, on the way to being round.  The question is how much to saw or plane off each corner to leave 8 sides of equal width at each point along the tapered spar, and the answer is simple but not obvious.  I spent some time reading up on it to postpone going out in the hot sun and actually doing any work.  You can skip the next paragraph without harm.

It turns out you make a gauge as follows: take a straight piece of wood and mark two points a little farther apart than the width of the spar.  In between the points, make two more marks spaced so that the distance between the end points is divided in the proportion of 3 1/2 : 5 : 3 1/2,  Lay the gauge across the spar so that the end points line up with the edges of the spar, and mark where the two intermediate marks lie.  Do this all along the spar and connect the points and you have lines to cut to.  Repeat on the other three sides of the spar, and you have all the 45-degree cut lines.  After it is 8-sided, you can move on to 16-siding by making a gauge with the proportions 3 1/2 : 1 1/4 : 2 1/2 : 1 1/4 : 3 1/2. But for a narrow spar like mine, the irregularities in the wood, the gauge and the width of pencil lines are enough to make it just as well to do the 16-siding by eye.  After I had this all figured out, it was even hotter outside so I spent some more time looking into whether the ratio 3 1/2 : 5 : 3 1/2 (in other words, .29166:.41666:.29166) was actually some natural law property of eight sided polygons.  After some headscratching and geometry, I figured out those numbers are a rule of thumb.  The exact ratios would be .29289... : .41421... : .29289.... But the difference for a 4" spar is only 1/200", less than the thickness of a layer of epoxy.

Armed with this new knowledge and a new gauge, I ventured out and marked one side of the spar for 8-siding.  I repeated on the second side, and did it better and quicker as I gained experience.  But by then my sweat dripping on the mast kept the pencil from making a mark, and I was getting too dizzy to see the mark anyway.  So I retreated inside.  That's it.  A day's work for an unaccountable amateur builder.

Here are some pictures I took in Quebec in June:


This double-ender, about 20' long, with two rowing positions, served as the ferry on the St. Lawrence between the mainland and a mile or so out to Isle aux Coudres, 100 mi. east of Quebec City.  It remained in service until 1962.  The beautiful island is still a trip back in time,  but now there's regular car ferry service.


A 13'8" skiff not too different from the one I'm bulding, designed in 1967 late in his life by Pete Culler, a legendary designer and boatbuilder. One objectionable feature is the rudder which is deeper than the skeg. The rudder would be the first thing to run aground unless the centerboard were all the way down, causing the boat to head downwind and possibly capsize.   I had many exciting moments in my brother's Bahama dinghy which was fitted out the same way.  The first sign of shallow water was when the rudder was knocked out of its gudgeons, leaving me hanging over the transom trying to rehang the rudder while the boat sailed wherever it wished, usually shallower water.

Thursday, August 12, 2010

Starting Work on the Mast

The weather cleared after a morning thunderstorm, so I enlisted the help of a friend to move the mast timber outside.  It has occupied the enclosed back porch since last December, and Mrs. Strongback was not disappointed to see it leave.

Using a circular saw, I cut on one face of the timber to the mast's outlines which I drew yesterday.  The saw blade wouldn't cut all the way through the 3 3/4" thickness, so I flipped it over and cut to the outlines on the opposite face.  The cuts matched up fairly well, but I had left 1/16 margin for trim anyway.  With the electric hand plane I carefully planed the trimmed faces until they were right to the line and square with the side faces.  When I was satisfied with that I flipped it over and planed the opposite cut face the same way.  That left the timber with the correct taper in one dimension.  I drew the outline on the two newly planed tapered surfaces, cut and planed them the same way.  At the end of the day I had a 4-sided mast blank with the right dimensions and the right taper.   Doesn't sound like much for a day's work, but I took my time to avoid ruining a piece of wood which was hard to find, expensive and slow to dry to a stable moisture content.  The weather was what you would expect it to be in the middle of August in Florida so I ended up tired, sweaty, and covered with enough planer chips and sawdust to resemble like a chainsaw sculpture.  Thank God for air conditioning and Cuba Libres.

Next step will be to gradulally turn the 4-sided mast blank into a round, tapered solid mast.

In yesterday's post I told what I'd learned about the history of wooden lumber schooners used on the St. Lawrence.  Here are a few related pictures:


This is just like the boat I saw in 1970 with a load of pulpwod being put aboard by hand.  The crew worked in pairs.  One man on the quay would lift a log with one hand underneath and the other hand holding a hook with a transverse wooden handle.  He'd hook the end of the log and throw it down to the deck where his mate would hook the leading end of the log on the fly, and catch the log underneath with his other hand.  The man on the quay would throw the log as high as he could, to make it hard for the man on the deck to catch it.  After they had the "schooner" fully loaded it was pinned to the bottom, so they had to reverse the process and unload about half the logs. A young man and woman standing beside me on the quay started laughing at them.  I moved far enough away to show that I was not with them.


This is the same type of boat, now at a maritime museum at St. Joseph de la Rive, east of Quebec City.  It was one of the last boats of its type in operation, retiring in 1972.  No epoxy was used in its construction. It doesn't look like a flat bottomed boat, but what looks like the keel is a heavy external chine.  The actual bottom timbers are about the thickness of railroad ties. 
  On the right is the hulk of an older schooner. I couldn't learn much about it from the people at the museum; either they didn't know or couldn't overcome my lack of French.  It is round bottomed, but you can see that the keel is not deep.  It looks like a sailing hull, but would have needed a centerboard; not an unusual thing for coasting schooners.


Finally, this interesting boat represents the last days of sail for the lumber-hauling vessels.  The schooner rig has been modified by shortening the mainmast and moving it aft, so the "schooner" was actually a ketch.  That leaves more room on deck for the lumber. How do you suppose the helmsman saw where he was going? The photo wasn't dated.  I'd guess it was from around 1920.


Wednesday, August 11, 2010

Hello! I'm back.

Back home after a 3-month family-visiting/camping/cycling/canoeing/hiking trip.  12,000 miles which took us to Colorado, down to Dallas, up to Michigan, clockwise around the Great Lakes, E. to the Saguenay Fjord in Quebec, and S. back to Florida.  Just a great trip.  Maybe the Canadian Maritimes to Nfld. and Labrador next time.

After a few days of unpacking and making notes for our next overland trip, I took the wrapper off Tugga Bugga and began to get organized to resume building her.  All the plans and many of the materials are there, but it is taking time to get my head around the project.  Frames, deck, coaming, thwarts and centerboard trunk all must go in; and then the hardware, rigging and finishing, and they all have to be done in the right order.  Planning is part of the fun of building, but I have also learned on previous projects that you can think too much: when I can't think how to do a particular step, sometimes the solution becomes clear when I just do it.

While I get organized, one stand-alone job is to make the mast.  The timber has been sitting inside since last December.  In the spring I planed the rough cut 4x4 down to 3 3/4 square.  I weighed it yesterday and found that, allowing for what was planed off, the wood has actually gained weight since February.  I guess that is conclusive evidence that it is thoroughly air-dried.  I calculate that the finished mast will weigh 35# before finish is applied.  Let's see how close it works out.

The douglas fir timber was straight when I bought it and set it up to dry 9 months ago, but I began today by streching a string on two adjacent faces of the timber to check if it is still straight.  Nope.  It has a good 1/4" of warp in one plane, and a significant twist through its entire length.  The twist is no problem, since the mast will end up round anyway, and there is enough wood to cut away that I can make it straight even if the rough timber is not.

Chapelle's plans specify the mast diameter at the heel, at the height of the sprit, at 2/3 thirds its height, and at the head.  It will taper from 3 1/4" at the thwart to a very slender 1 1/4" at the head. On two opposite faces of the timber I marked those measurements and struck straightlines connecting them.  After I cut to those lines with a circular saw and electric hand plane, I'll mark the cut faces with the same measurements and cut them the same way.  Then I'll have a 4-sided piece with the correct taper.  I'll trim the corners to make it 8-sided (there's a neat trick to doing that- will explain when I get to it), then on to 16-side, then plane and sand to make it a round spar.  First I have to get help to heft the timber outside where I can work on it.  There's a tropical storm in the area, so no rush on that.

On our trip I had an opportunity to visit several maritime museums along the St. Lawrence and piece together the history of boats used to haul lumber in the 19th and 20th centuries.  I learned that I had seen firsthand one of the last of those boats.  On a trip with my family in 1970 I saw pulpwood loaded by hand into the hold and onto the deck of a beamy wooden motor vessel about 100' long, with a high deckhouse aft and a small cargo mast forward.  I think it was at Trois Pistoles, on the south shore of the river.  After the boat was loaded, the weight of the wood had pinned the boat to the bottom, and the workers had to unload about half the wood to get it free.  Though their comments were in French, I could understood they weren't happy. 

In the late 19th century, lumber and pulpwood was carried up the St. Lawrence by two-masted schooners similar to coasting schooners which used to haul bulk cargoes all over the Atlantic seaboard until trucks, not railroads, made them obsolete.  Steam engines may have provided power for winches and windlasses, but not for propulsion.  When gasoline engines became available, they began to be used for auxiliary power on these lumber schooners, but the hull and rig were still those of sailing schooners.  The next step in the evolution was greater dependence on the engine, and the sailing rig was changed by making the foremast larger and farther forward, and the mainmast farther aft and smaller.  That made it easier to load lumber amidships, but the "schooner" was now actually a ketch.  Later boats eliminated the small after mast altogether and reduced the size of the forward mast, though it still carried a gaff sail.  The next step was to do away with the sail entirely, and remove the bowsprit.  At some point, diesel power replaced gasoline engines.  Finally, since the hull shape of a sailing vessel was no longer needed, they began to build the boats with a strange flat bottom. Afloat they looked like normal round bottomed boats, but below the waterline they were effectively sliced off horizontally.  That way they had almost as much carrying capacity, but could operate closer to shore, and could also sit upright on the bottom at low tide- the St. Lawrence has as much as a 20' tide.  Through it all, they called them "schooners".  The boat I saw in 1970 was that last version, and the last of that type went out of service within two years after that.  I was lucky to see one in operation. To the end, the watermen called them "schooners".

They won't be building any more wooden lumber "schooners", but the Chesapeake Bay crabbing skiff will live again!

I have learned that two of my disrespectful sons had been betting whether I could write a whole entry on this blog without using the word "expoxy".  Well boys, there it is.