
Thursday, Sept. 30
Yesterday and today were spent moving along two unrelated projects.
I sanded all the filled holes yesterday, and refilled about a dozen places which I either missed or filled unsatisfactorily. Today I found that these refilled spots had failed to cure overnight. I think the catalyst I used was too old. I had no reason to think waiting longer would help the bad epoxy mixture to cure, so I scraped off the excess, sanded, and wiped the spots with acetone. Those will be potentially weaker spots, even when covered with fabric and epoxy, but there's nothing more I can do about it, and I don't think they will be much of an issue anyway.
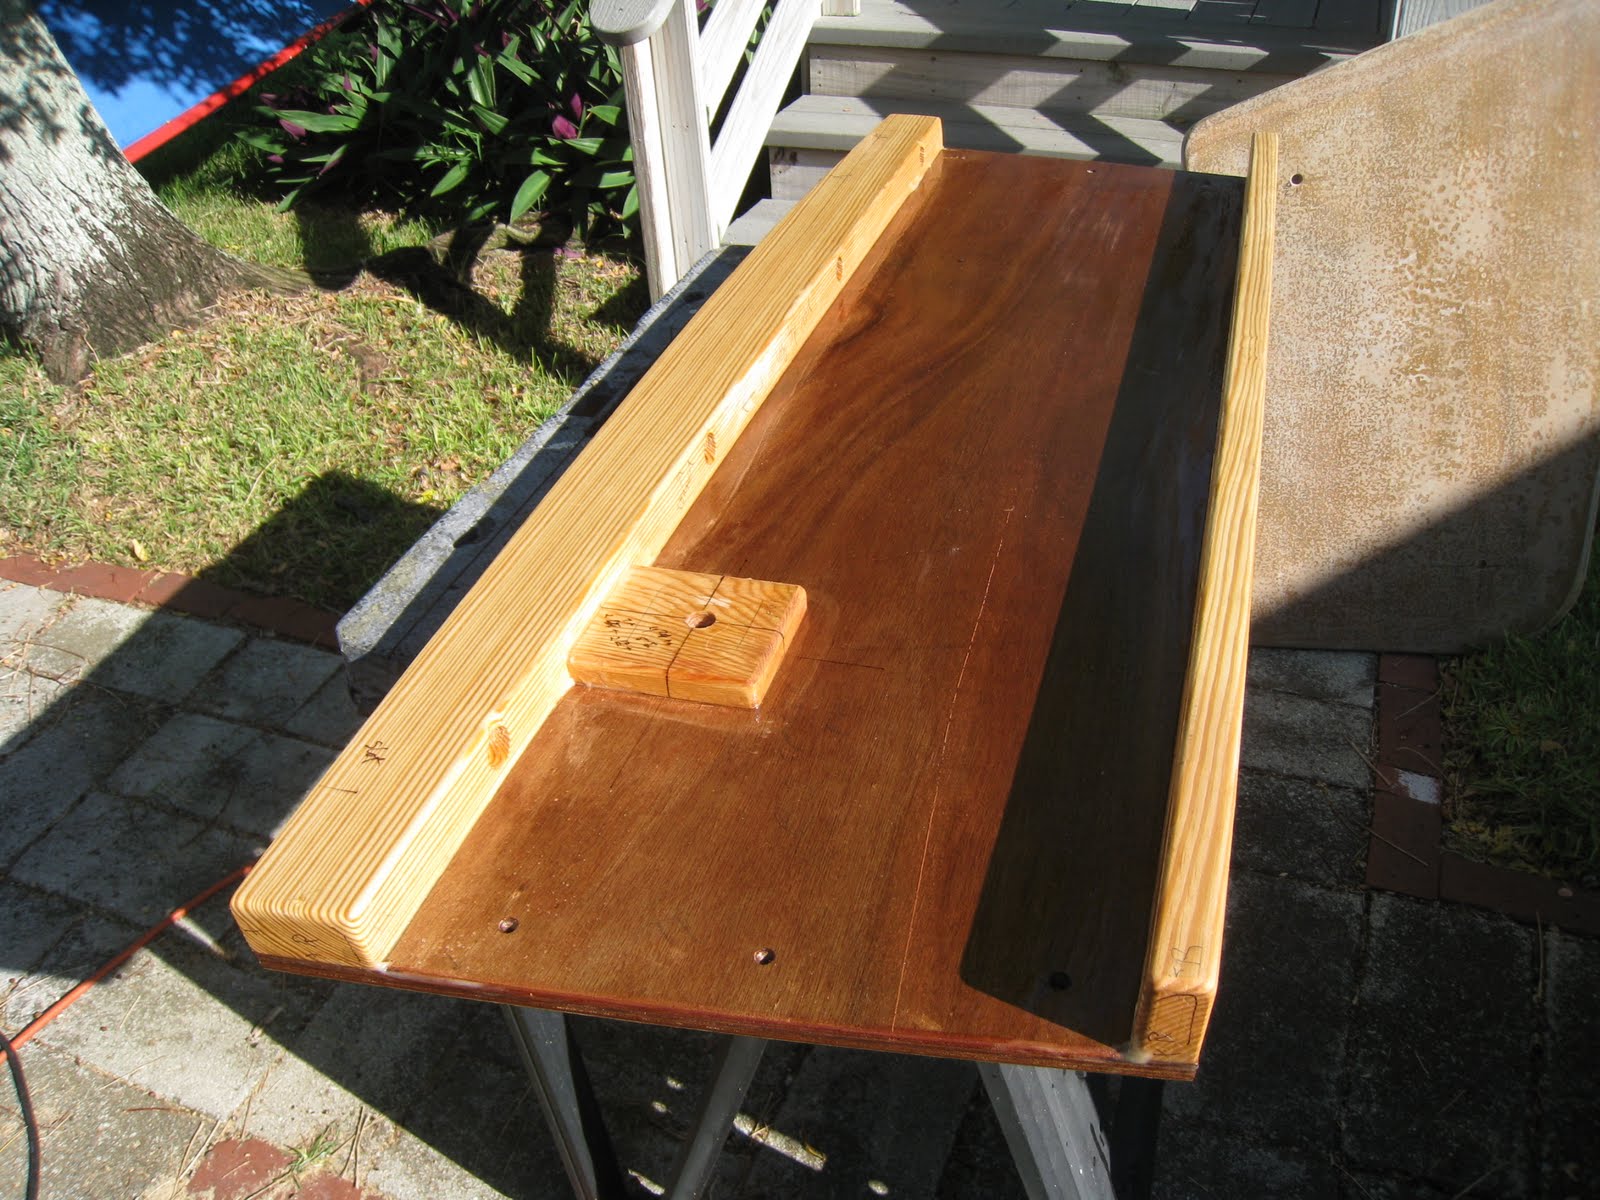
Also today I rolled out the polyester fabric and cut pieces to cover the bottom and topsides. As if I wasn't already feeling stupid, it turns out I ordered one yard of fabric too little, so it won't reach the stern on the starboard side. I have enough offcut pieces to make up the difference, but I will have an overlap bump near the stern on the bottom and topside. I'll have to smooth that bump with filler and sanding. Extra work which would have been avoided if I had just ordered enough fabric. Even so I don't have enough to cover the rudder, so I'll have to order more.
I am ready to take the plunge and cover the bottom and sides with fabric set in epoxy. I want to do that whole job in one day because as long as epoxy is tacky I can add more and it will bond chemically. If I let it harden I would have to let it cure and sand it before adding any additional epoxy.
The other project is the sprit. Yesterday I marked and cut the taper, using the method I described in my last post, leaving it a tapered 4-sided stick. Today I marked it for 8-siding and planed it down to those marks. Then I 16-sided it by eye with a plane, continued to plane off any perceptible edges, and sanded it round. The job went more quickly than the mast did. The sprit is a smaller spar, and I had the comfort of having made the mast using the same method and skills, which I have not forgotten yet. All three spars are now ready to finish.
Finally, as I was cleaning up at the end of the day, the sailmaker called to let me know the sail is finished, so I'll try to also fit in a visit to the sail loft tomorrow.
Thursday, September 30, 2010
Tuesday, September 28, 2010
342 Holes Filled, and a Challenge for Readers
Tuesday, September 28
Two projects today: one mindless, the other definitely not.
I filled 342 screw holes, bolt holes, dings, joints and mistakes with epoxy putty. Yes, I counted. I had nothing better to do at the time. That was the mindless job. Tomorrow, when the filler is cured, I'll put on my respirator and sand them all down.

The other job was to calculate and mark the taper for the sprit. I did not have to invent a method; Howard Chapelle's Boatbuilding spells out how to do it. I enjoyed the challenge, and if you care to give it a try, see if you can follow his instructions and determine what the diameter of the sprit should be at intervals along its length. All you need is a piece of paper, a ruler, pencil and compass. Here are the plan specificatons, and Chapelle's instructions, reproduced here without permission, of course:
Sprit length 10'5"
Sprit diameter:
3/4" at sheet (aft) end
1 3/4" at 1/3 aft of mast
7/8" at fore end
(Fore end extends 10" forward of mast)

Monday, September 27, 2010
Last Thwart In, Starting on Exterior
Yesterday I permanently installed what I call 'thwart 3", to the aft of the centerboard trunk. I epoxied and screwed it in place, and although that thwart is hard to get in place past the frame against which it butts, the epoxy made it a little slippery, and the fit went smoothly. I screwed it down to the risers, and added screws through the frames and through the sides. That thwart, which is just about midship, provides almost all the lateral support for the boat's sides, holding it in its shape. All those screws will help make it a strong assembly, and I filled all gaps with epoxy to make it stronger yet.
The two thwarts sagged just a little when I put my weight on them, so I made wood blocks to screw under the thwarts and also screw into the ends of the centerboard trunk. I epoxied and screwed them into place, and now the thwarts are solidly rigid.
The only remaining installation inside the boat is the stern sheets (the seat at the stern), which doesn't support anything except the sailor, so the boat is now structurally complete. Rather than do the finish work inside, I decided to turn the boat over and finish the sides and bottom. Preparing to turn it over was a good occasion to clean up the work site, pulling out all the scrap pieces of wood which have accumulated under the boat and sweeping up a lot of sawdust and planer shavings. Also before turning her over, I trimmed the outer stem and the sternpost to their final heights. Here the boat is ready to turn over:
 I turned her over with the help of Mrs. Strongback, whose dedicated work at the gym qualifies her for that name, though she'd deny it.
I braced the boat up high enough to work on, and sanded the entire exterior hull in preparation for filling, sanding, fairing and sanding before covering the exterior in fabric and epoxy. Here, she's ready for that next step, which I plan to tackle tomorrow:

After turning the boat over, I weighed it by weighing myself holding up each end. It's 184 pounds now. The centerboard will add 30 pounds, the rudder nd tiller probably a little less, and the rig probably 40 pounds. So around 300 pounds is what I'll end up with.
I 8-sided the little club spar, then sanded it round, or rather roundish, and notched the ends. It is ready to varnish, unless I decided to sand it more first. Finally today, I ran the sprit timber through the thickness planer repeatedly to get it to a smooth, square 1 3/4" thickness. tapering and rounding it will be a significant job, more than the club, but less than the mast.
The two thwarts sagged just a little when I put my weight on them, so I made wood blocks to screw under the thwarts and also screw into the ends of the centerboard trunk. I epoxied and screwed them into place, and now the thwarts are solidly rigid.
The only remaining installation inside the boat is the stern sheets (the seat at the stern), which doesn't support anything except the sailor, so the boat is now structurally complete. Rather than do the finish work inside, I decided to turn the boat over and finish the sides and bottom. Preparing to turn it over was a good occasion to clean up the work site, pulling out all the scrap pieces of wood which have accumulated under the boat and sweeping up a lot of sawdust and planer shavings. Also before turning her over, I trimmed the outer stem and the sternpost to their final heights. Here the boat is ready to turn over:

I braced the boat up high enough to work on, and sanded the entire exterior hull in preparation for filling, sanding, fairing and sanding before covering the exterior in fabric and epoxy. Here, she's ready for that next step, which I plan to tackle tomorrow:

After turning the boat over, I weighed it by weighing myself holding up each end. It's 184 pounds now. The centerboard will add 30 pounds, the rudder nd tiller probably a little less, and the rig probably 40 pounds. So around 300 pounds is what I'll end up with.
I 8-sided the little club spar, then sanded it round, or rather roundish, and notched the ends. It is ready to varnish, unless I decided to sand it more first. Finally today, I ran the sprit timber through the thickness planer repeatedly to get it to a smooth, square 1 3/4" thickness. tapering and rounding it will be a significant job, more than the club, but less than the mast.
Saturday, September 25, 2010
Centerboard Trunk Done/Complete/Installed/Finished
I started the day putting a third coat of paint on the centerboard trunk cap, in the darkened green color I finally settled on yesterday. Also, since this is the last chance to paint the undersides of the thwarts and see what I'm doing, I gave the undersides a coat of the same trim color paint.
Moving on to the boat itself, I painted the sides and frames adjoining the thwart locations, because they will be hard to reach after the thwarts are in.
While that paint dried, I started work on the small spars, the sprit and the club. The sprit is to be 10 1/2 feet long, with a maximum thickness of 1 3/4". That is an inconvenient thickness to find. I decided to laminate it of two nominal 2x spruce boards. At the fore end it should taper down to 7/8". and at the sheet end it is only to be 3/4" thick. Anyway, there was was quite a pile of rejected lumber at Home Depot before I had selected a 2x6 12' spruce board with straight grain and only small sound knots- an oversight on their part. I ripped two pieces 2" wide on the table saw, and glued them together with epoxy, clamping them to the still-extant strongback with all my clamps. Tomorrow or whenever, I will run the glued piece through the thickness planer to make one 1 3/4" square piece before marking and planing the tapers. With the offcut of the 2x6, I chose the best 4' section to make the club. The plans just say make it 4' long, with no details. I planed the piece to 15/16" square, then tapered it to a shy 3/4" square at the ends. I don't know if that is the right size. I just want it to be strong enough, but light weight in case it hits someone (i.e. me) in the head.
When these minor spars are made I need to set about finishing them as well as the mast. There will be several coats of varnish to apply. The weather pattern at this time of year is not good for varnishing: hot and sunny early, thunderstorms late, and humid all the time. I ought to try to find space indoors for it. I can always carry the spars outside for sanding between coats.
By the time I'd rough-cut the sprit and club, the paint was long since dried. I went ahead with final installation of the forward rowing thwart, gluing and screwing it in place. Then I could install the centerboard trunk. I applied a thick coat of epoxy to the keelson in the way of the centerboard trunk, and laid the trunk in place, sliding it forward into the notch in the thwart. I dropped two bolts into place to align the trunk, then climbed underneath and drove the other six bolts up through the bottom and the trunk logs. Then I pulled the first two bolts, drove them up from underneath, put washers and nuts on them all, and tightened the bolts down until there was epoxy squeezing out, both outside and in the slot. Cleaning up that excess, a good day's work was done. Tomorrow the after thwart can go in.

Friday, September 24, 2010
Green Paint
From what I've been able to learn, phasing out and ultimately banning oil-based paint is on the EPA's agenda. The idea is that prolonged exposure to solvents can cause brain damage, which certainly gives me a Mulligan. The paint makers are working to develop acrylic paints which hold up as well as oil based paints and can be applied over old oil based paint. Anyway, for this boat I decided to get ahead of the curve and use the best acrylic (water-based, hence "green") paint I could.
There is a good Dyco paint store in my town, with knowledgeable people, and they tell me that acrylic paints dry fast but cure slowly, as long as a month. Their paints are not specifically for marine use, but they encouraged me to give them a try.
I bought a white semi gloss paint for the topsides, a light gray green for most of the inside, and a darker gray green for concrast color on the trim. I'll use red antifouling paint, which I already have, for the bottom, the centerboard and trunk inside, and the rudder below the waterline. When I first applied the light color to the risers, I was surprised that it looked almost white. Today I sanded and painted the centerboard trunk, and used the darker color on the cap. I decided that both colors are too light and that there is not enough contrast between them. So I took the paint back to the Dyco store today and had both colors darkened. After putting a second coat on the c.b. trunk (really does dry fast) I liked the lighter of the two colors but still wasn't satisfied with the amount of contrast. So I took the trim paint back to the store again. They started all over with a dark base, and insisted on not charging me for the new trim paint. Impressive: that will keep me going back to them. While I was out I also picked up a piece of spruce for the sprit and club spars.
So here is the centerboard trunk, with a swatch of the darker trim color just visible on the cap. I like the colors, which is important because I will to be looking at them a lot. Even more important, Mrs. Strongback likes them.

Thursday, September 23, 2010
Fitting the Centerboard Trunk and Thwarts
Thursday, Sept. 23
After putting the trunk in place on the keelson this morning, I located the first bolt hole by tapping a bolt down through the log and rapping it to make a mark on the keelson. I drilled through the keelson, bottom and gripe, using a level to keep the drill straight up. After the first bolt was seated, I marked and drilled a second hole at the other end of the trunk. Since I was drilling 1/4" holes for 1/4" bolts, the holes (after the first one) needed to be in just the right place or they wouldn't fit. I was worried how that would go, needlessly. I put a rat tail file in the electric drill and reamed the hole out just a little, and the bolt dropped right in. The other six bolt holes went just as well. I'm using carriage bolts, which for final installation will be driven up from underneath, so I went under the boat and countersunk the bolt holes so the head of the bolts will seat below the gripe's surface level, and can be filled and faired later. To give myself a fore and aft reference for fitting the trunk when the thwarts are in, I marked the side of the trunk at the bottom, perpendicular to one bolt hole, and marked on the keelson at the same place.
When all the centerboard bolts were drilled, and the board was in place, it was finally time to cut the centerboard slot in the bottom. I have been putting that off on any pretext, because cutting a hole in the bottom of the boat is a thought which should make anyone uncomfortable. And any mistake would be hard to fix. To mark where to cut the slot, I could think of two approaches. I could mark where the outside of the centerboard trunk lies, and measure how far the slot is from the ends and sides; or I could go low-tech and tape a pencil to a long stick and reach down in the centerboard trunk and mark the slot outline. I did both. The measured marks lined up pretty well with the stick/pencil marks. Where they were off a little, I gave greater weight to the stick/pencil marks. But I was out of excuses: it was time to cut. Using the circular saw, I lined up the blade and the saw's reference mark with the cut line and gradually lowered the saw until it was flush with the keelson. Success: the saw blade was on the cut line. After cutting the fore and aft lines, I cut the ends with the jigsaw, and checked the hole by replacing the centerboard trunk. Not only looks OK, the saws had made clean cuts which will need very little trimming or sanding. A hole has never looked so good to me:


With the centerboard bolt hole reference marked, I could start to fit the trunk with the thwarts. I moved the trunk out of the way and screwed the forward thwart in place.

Using the refernce marks, I measured for the notch to cut in the thwart for the trunk, and made the cut with the jigsaw.

When the trunk was moved into the notch in the forward thwart and the bolt locations checked, I removed the thwart and the trunk and repeated the process with the thwart at the after end of the trunk. When the notch was cut in that thwart, I replaced the forward thwart and the trunk, and negotiated the after thwart into place. When the after thwart dropped into place, it was a happy moment. I had been worried that this assembly would be an impossible Chinese puzzle, like screwing three pieces together in both directions from the inside. In the event, the trunk and the thwarts fit together very well with little complaint.


For good measure, I hung the centerboard, just to see how it would look in place.
Although I'd already accomplished a lot today, there was still time left to take it all apart and sand and fair the outside of the centerboard trunk, in preparation for painting it. That will be easier before it is bolted in place and the thwarts are screwed down, putting some parts out of sight. For the same reason, I'll paint the underside of the thwarts before permanently attaching them, and the inside sides and frames before any of it.
Wednesday, September 22, 2010
How Will I Raise and Lower the Centerboard?
I received an anonymous comment asking how I will raise and lower the centerboard; a perceptive question. I've been asking myself the same thing, with no final solution. I'm open to suggestions.
The board weighs 19 pounds. It has a specific gravity something less than 1. In other words, it floats. I'm just guessing it will float on its own about halfway down, and will be no problem to raise and lower by hand, with no tackle required.
Two problems occur to me. The easy one is how to keep the board in place when I want it all the way up, or partly up? I drilled a hole near the top of the board, and will insert a wooden peg to hold the board all the way up. I'll hold the board partly up the traditional way, with a wedge.
The trickier problem comes from the fact that the board disappears completely below the top of the trunk by several inches when it is all the way down. Whether I will ever want the board down to its extreme limit depends on how the boat balances under sail. but if I do want it all the way down, how will I get it there, and how will I retrieve it once it is? I will have a stainless steel tang attached to the top of the board. I plan to attach a narrow shackle to the tang, holding a thimble with a spliced length of light line, making a pennant for the centerboard. When the board is up, giving the pennant a good pull back may give the board enough swinging momentum to drop all the way down. If not, I would need a push-stick. I will raise the board by pulling up on the pennant. I'm a little concerned whether the pennant might possibly get jammed in the trunk, but I don't think it will unless the tang can drop below the bottom of the boat.
Once the boat is built, if the board tends to float too high, I can experiment by clamping various weights to it, and then drill an appropriate sized hole in the board and fill it with lead.
If Anonymous or anyone else better ideas, this is a good time to speak up. Thanks for the question, Anonymous, and I'll report the results.
Red Letter Day- Centerboard Trunk Made, and First Paint
Wednesday, Sept. 22
It has always amazed me how little can get done some days, and how much on others, like today.
As planned, I rounded off the edges of the #2 thwart on the router table, sanded both thwarts, and sealed them with epoxy. The thwarts are yellow pine, which is a beautiful and strong wood when planed and sanded, but it needs to be sealed and screwed down quickly or it tends to warp.
I glued and screwed one side of the centerboard trunk to the headledges, then applied a final coat of epoxy to the insides of the centerboard trunk. I did not expect to be able to do more on it today, but It was hot and sunny and the epoxy set up quickly. So I sanded the sides and painted them with antifouling paint- the first paint on the boat.


The paint also dried in about an hour, so I glued and screwed the other side to the headledges, completing the centerboard assembly.

Finally, I put a coat of paint on all sides of the risers, the little pieces which support the thwarts, because I know they will be inaccessible once they are in place. The basic color for the boat's inside is a light gray green. In the photo it looks white like the paper under it, but it is gray green for sure.

There's a tradition that when a ship's last "shutter" plank is in, the whole workforce gets a tot of rum. Since my planks are plywood, I missed out on that. So when the first paint was applied, I gave the entire crew a tot of rum, and I enjoyed it.
It has always amazed me how little can get done some days, and how much on others, like today.
As planned, I rounded off the edges of the #2 thwart on the router table, sanded both thwarts, and sealed them with epoxy. The thwarts are yellow pine, which is a beautiful and strong wood when planed and sanded, but it needs to be sealed and screwed down quickly or it tends to warp.
I glued and screwed one side of the centerboard trunk to the headledges, then applied a final coat of epoxy to the insides of the centerboard trunk. I did not expect to be able to do more on it today, but It was hot and sunny and the epoxy set up quickly. So I sanded the sides and painted them with antifouling paint- the first paint on the boat.


The paint also dried in about an hour, so I glued and screwed the other side to the headledges, completing the centerboard assembly.

I also glued and screwed the outer stem in place. I made that piece a long time ago, but put off attaching it because I thought it would be easier to fit the deck while the stem was out of the way. I've gained confidence since. The stem needs to be trimmed at the top, of course.
Finally, I put a coat of paint on all sides of the risers, the little pieces which support the thwarts, because I know they will be inaccessible once they are in place. The basic color for the boat's inside is a light gray green. In the photo it looks white like the paper under it, but it is gray green for sure.

There's a tradition that when a ship's last "shutter" plank is in, the whole workforce gets a tot of rum. Since my planks are plywood, I missed out on that. So when the first paint was applied, I gave the entire crew a tot of rum, and I enjoyed it.
Tuesday, September 21, 2010
Making and Fitting the Rowing Thwarts
Tuesday, Sept. 21. Fall is here, and it is welcome.
I had two projects planned for today, but didn't get to either of them.
I intended to make a sprit by laminating pieces of fir left over from making the mast, but there was not enough sound wood remaining in the fir offcuts; I'll have to shop for timber for that.
On the centerboard and trunk, I meant to glue and screw the headledges to one side panel, and do some epoxy fairing on the board, but those are small "wet" jobs; I didn't want to do them and then have time for another project which would generate sawdust. So before doing them I started work on the thwarts which will support the centerboard trunk. I had made patterns for the thwarts a week or so ago. Today, starting with yellow pine 2x10 lumber, I cut the planks to the rough length of the thwarts. The forward thwart is to be 8" wide, so I ripped it to that width. The after one is 9", and the nominal 2x10 is 9 1/8" wide, which was close enough. The nominal 2x planks are about an inch and a half thick, so I used the thickness planer to take them down to 7/8", which the plans call for. That generated an unbelievable volume of planer chips: a whole trash can full. Then I followed the patterns for the angles and bevels of the ends. The longer of the two thwarts, the after one, also needed to be cut away on each end to fit around frames. After all that cutting, the after thwart fit pretty darn well, and the forward one fit just right with no tweaking. They are both long enough that they fit tightly against the sides, providing lateral support which nothing else does. All told, it took half as long to make and fit the thwarts as it did to make patterns for them. Having dry fit the thwarts by screwing them down to the risers, I unscrewed them and used the router to round off the edges of the after thwart. I was about to do the same to the forward one when I needed to stop work to take care of an unrelated chore. I never did get the "wet" work done on the centerboard and trunk, but I am pleased at how the thwarts turned out. I'll post a picture in the next day or two.
I did nothing as planned today, but nevertheless I made a detailed plan for tomorrow.
Monday, September 20, 2010
More Work on the Centerboard Trunk
Friday, Sept. 17-
Most of today's activity was finding materials for the centerboard pivot pin assembly. A fruitless search for a non-ferrous 1/2" pin, settling for galvanized. But I did find some nylon spacers, 1/2" inside diameter. They will make good bushings to keep the centerboard from wearing and exposing the wood to moisture.
The plans simply say "1/2" pin", with no suggestion how to keep it from leaking or abrading the centerboard or the trunk. The pin location on the centerboard trunk I've built is just 1/2" plywood: not a good thickness to bear weight. A bolt would have to be tightened against washers to make it waterproof, which might distort the trunk sides and maybe even make the centerboard bind. I've given it a lot of thought, and what I settled on is an unthreaded pin which goes all the way through the trunk sides and centerboard, and through wood blocks attached outside the trunk sides, with the outside holes covered by a metal plate screwed on, with bedding compound underneath the metal plate for a sealer. A picture might help, but for some reason the following photo uploads rotated 90 degrees to the left; turn your head to the right to get the right side up.
 The shopping and metal fabrication took a lot of the day, but I did sand the centerboard trunk edges flush and square, and worked on fitting the bottom edge of the trunk to the keelson. There's more of that to do before I'm satisfied.
Monday, Sept.20-
No boatbuilding Saturday or Sunday as we had a houseguest, but today I got some good work done. Working to improve the fit between the bottom of the centerboard trunk and the keelson, I sanded the keelson to get rid of any invisible high spots. Then I put the trunk in place and used a slip of paper as a feeler gauge between them to locate the contact points and sand them off. Of course, I checked and rechecked that the trunk remained plumb each time I sanded it.
Finally satisfied with the fit, I unscrewed the sides from the headledges and secured the wooden blocks backing up the pivot pin to the trunk sides, screwing them on from the inside of the trunk sides. I disassembled the trunk and used the router and sander to round off and smooth exposed corners. Next I matched up the two sides and, after double and triple checking, drilled the hole for the pivot pin through both sides and both backer blocks, and also drilled the pivot pin hole in the centerboard itself. Then I was ready to do some permanent assembly with epoxy adhesive. I glued and screwed the wood backer blocks on, and glued and screwed the caps and logs to the trunk side, Then I sealed the trunk outsides with penetrating epoxy, and did the same for the inside faces of the headledges. Finally, I sealed the thwart riser pieces, which had been partly done before, and left it all to cure overnight.

I still need to fill the screw holes on the inside and paint the inside of the trunk. Then I can permanently attach the two trunk sides together and, except for a little final filling, sanding and painting, the centerboard trunk will be done and I can drill the bolt holes to mount it in place.
Most of today's activity was finding materials for the centerboard pivot pin assembly. A fruitless search for a non-ferrous 1/2" pin, settling for galvanized. But I did find some nylon spacers, 1/2" inside diameter. They will make good bushings to keep the centerboard from wearing and exposing the wood to moisture.
The plans simply say "1/2" pin", with no suggestion how to keep it from leaking or abrading the centerboard or the trunk. The pin location on the centerboard trunk I've built is just 1/2" plywood: not a good thickness to bear weight. A bolt would have to be tightened against washers to make it waterproof, which might distort the trunk sides and maybe even make the centerboard bind. I've given it a lot of thought, and what I settled on is an unthreaded pin which goes all the way through the trunk sides and centerboard, and through wood blocks attached outside the trunk sides, with the outside holes covered by a metal plate screwed on, with bedding compound underneath the metal plate for a sealer. A picture might help, but for some reason the following photo uploads rotated 90 degrees to the left; turn your head to the right to get the right side up.

Monday, Sept.20-
No boatbuilding Saturday or Sunday as we had a houseguest, but today I got some good work done. Working to improve the fit between the bottom of the centerboard trunk and the keelson, I sanded the keelson to get rid of any invisible high spots. Then I put the trunk in place and used a slip of paper as a feeler gauge between them to locate the contact points and sand them off. Of course, I checked and rechecked that the trunk remained plumb each time I sanded it.
Finally satisfied with the fit, I unscrewed the sides from the headledges and secured the wooden blocks backing up the pivot pin to the trunk sides, screwing them on from the inside of the trunk sides. I disassembled the trunk and used the router and sander to round off and smooth exposed corners. Next I matched up the two sides and, after double and triple checking, drilled the hole for the pivot pin through both sides and both backer blocks, and also drilled the pivot pin hole in the centerboard itself. Then I was ready to do some permanent assembly with epoxy adhesive. I glued and screwed the wood backer blocks on, and glued and screwed the caps and logs to the trunk side, Then I sealed the trunk outsides with penetrating epoxy, and did the same for the inside faces of the headledges. Finally, I sealed the thwart riser pieces, which had been partly done before, and left it all to cure overnight.
.
I still need to fill the screw holes on the inside and paint the inside of the trunk. Then I can permanently attach the two trunk sides together and, except for a little final filling, sanding and painting, the centerboard trunk will be done and I can drill the bolt holes to mount it in place.
Thursday, September 16, 2010
Assembling the Centerboard Trunk
Thursday, September 16
I started this morning by sanding the centerboard and the insides of the centerboard trunk sides. They are covered with polyester fabric set in epoxy, and I was pleased how well they sanded smooth. There's still a finish layer of epoxy and paint to apply, but I'm enough satisfied that I know the final thickness of the centerboard to commit to the 1 1/4" inside width of the trunk, which becomes the headledge thickness. I planed those pieces to 1 1/4" exactly.

 ... leaving the ends long. I marked them for cutting, then unscrewed the pieces and trimmed off the excess.
 Here is the assembled centerboard trunk, set in place. Before it is actually "done", there's lots to do: sand the edges flush, fit the bottom edge as closely as I can to the keelson, then disassemble it, round off the exposed corners. Then I can glue and screw the logs and caps, drill the sides for the pivot pin, and epoxy seal and paint the insides. Then the sides can be glued and screwed to the headledges, and.... You get the idea.
 Note to myself: When using the shop vac to clean out the dust bag on the sander, connect the shop vac's hose to the vacuum port, not the blower port.
Wednesday, September 15, 2010
Sail Ordered, Moving Forward on Sealing and Centerboard Trunk
Tuesday, Sept. 14
Last Friday I had called on five local sailmakers epoxied board and trunk. One was a racing sail specialist, another was a name-brand sailmaker whose sails are made in China. At two places there was no one there to talk with so I left my contact info. The last visit, which turned out to be the most interesting, was to a local one-man loftweren't there, and the other is a local one-man loft. He showed interest in my boat; asked lots of questions, some of which I hadn't thought about; and quoted a fair price (not the lowest: that was the Chinese sail). His specialty is cruising sails, and he's been at it for many years. He seems to be the best choice for what I need. I pretty much decided on him, but I waited until Monday for the two callbacks. Tuesday I called him to give him the go-ahead. He made an appointment for Wed. morning to come take a look at the boat and particularly the mast. I think he didn't want to make the sail to the design specs only to find I had made the mast too short.
Actual work I got to on Tuesday included sealing the frames, mast step and thwart risers with epoxy. After that step I didn't want to make any sawdust. In the future I'll try to schedule epoxy, paint, and varnish should for late in the day when I'm also cutting or sanding.
 Anyway, I moved well away from the work site to build a router "table" so I can use that tool outside. The table consists of a panel of 12mm marine plywood with a hole for the router bit and countersunk bolts through the panel into the router's face plate. Tomorrow I'll put the table to the test.
Wednesday, Sept. 15:
Today started with the temperature in the high 70's: the coolest morning since we got back home at the beginning of August.
The sailmaker arrived mid-morning with a tape measure and a list of questions. Besides verifying the mast is to spec, we discussed what halyard and downhaul hardware be mounted on the mast, how the sprit and club will be rigged, how the luff of the sail will lace to the mast, and how the sail will be reefed. He wants to make the sail in stages, and meet with me after the sail is rough sewn to agree on the finishing details. He says it will only take a few weeks to make the sail, which would probably be sooner than I'm ready for it. Choosing a sailmaker is a big decision, but I feel confident about it.
My target for this phase of the boat's construction is to get the centerboard trunk and thwarts made, then mate them up and attach them. The centerboard trunk is the most time consuming part, so today I got out the remaining parts of the trunk. I cut a 2x8 yellow pine board to length for the trunk logs (fore and aft pieces on the bottom of each side of the trunk), the caps (fore and aft alongside the top edges of the trunk), and the headledges (spacers between the two sides). I ripped the pieces to rough width on the table saw. I predrilled the logs for the bolts which will secure them through the bottom. Then ran all the pieces through the thickness planer to get them smooth and to the precise right thickness and width. Exception: I left final thickness planing of the headledges until I'm finished with the centerboard and trunk sides. Then I got out my new portable router table and rounded off the edges of the logs and caps which will be exposed. The router table worked perfectly. Finally today, I sanded the mast where I had filled some imperfections. No photo ops in today's work.
Monday, September 13, 2010
Mast Step and Coaming Pattern
Sunday, Sept. 12, 2010
Sunday's jobs were making the mast step and making a pattern for the coaming. The mast step is simple enough: a block of white oak with a hole cut out into which the tenon in the heel of the mast will fit. The only complications are that the mast is to rake back at 13 degrees. The bottom profile where the step attaches rises at 5 degrees, so the step must point an additional 8 degrees aft, for the mast to fit in the step. The other consideration is drainage. Water in the bilge or on the mast must drain away easily and not leave the heel of the mast wet. So I made two wedges to brace the step to the right angle, and attached them to the underside of the step block.

I drilled the step hole all the way through the step block. Though the picture doesn't show it, I held the wood down with a clamp while drilling.
To keep water from collecting under the step block I used the router to cut a limber hole so water will drain back to the low point in the bilge. While I had the router going I eased the sharp top edges, and here's the completed step, ready to be screwed to the keelson:

The day's other project was to make a pattern for the deck coaming. This step is out of sequence, as I won't attach the coaming until the thwarts are done and the frames and inside sides are sealed and painted. But I was looking for jobs to be done while the thickness planer is unavailable.
 I made the pattern out of three panels of doorskin material, glued together. I marked 1 5/8" above each frame which will be the top edge line of the coaming.
 When the pattern was removed and laid flat I connected the top line marks with a long batten. The coaming is to be 3 1/2" wide, but as you can see it will curve considerably. The plans call for only 3/8" thickness, but that just seems too flimsy to me. I'm aiming for 5/8". But either way, it will be physicaly impossible to edge-bend a solid piece by the 5 1/2" curve required. If the coaming is to be a solid piece, it will need to be cut from a clear hard board 9" wide and 13 1/2 feet long. I'll need two such planks. If I can't find planks that big without breaking the bank, there's a plan B that will be more work. I can make the coaming out of two thicknesses of 6mm plywood. One thickness can be from two 8' lengths, and the other from an 8' length in the middle and 4' lengths on each end, so the joints are staggered. That will give me a strong piece 1/2" thick, which I can top with a 1/4" cap, cut from molding stock, to protect the edge grain of the plywood.
Monday, Sept. 13. Today started with a surprise call that the thickness planer was repaired and ready to be picked up in Tampa. Several projects had been awaiting that tool's return.
 Before heading across the Bay for the planer, I laid out all my scrap plywood to see if I have enough for the deck, and for the coaming if I make that of plywood. The answer is I have enough for the deck, but not enough for the coaming. With that knowledge I went to a specialty lumber yard. They had nothing suitable and big enough for solid coaming stock, but they did have a few sheets of damaged 6mm Okume marine plywood at a good price. A partial sheet is all I need, so I'm all set for coaming material.
Tomorrow I'll make a decision on a sailmaker, seal the frames with epoxy, measure the thickness of the completed centerboard to know how thick to make the vertical spacers ("headledges") in the centerboard trunk, and screw the mast step in place. I also need to make a router table that I can use outdoors, so I don't fill up the workshop with router shavings. Probably won't get it all done, but so what.

A watcher who shows interest without offering advice. What more could you ask for?
Sunday's jobs were making the mast step and making a pattern for the coaming. The mast step is simple enough: a block of white oak with a hole cut out into which the tenon in the heel of the mast will fit. The only complications are that the mast is to rake back at 13 degrees. The bottom profile where the step attaches rises at 5 degrees, so the step must point an additional 8 degrees aft, for the mast to fit in the step. The other consideration is drainage. Water in the bilge or on the mast must drain away easily and not leave the heel of the mast wet. So I made two wedges to brace the step to the right angle, and attached them to the underside of the step block.

I drilled the step hole all the way through the step block. Though the picture doesn't show it, I held the wood down with a clamp while drilling.
To keep water from collecting under the step block I used the router to cut a limber hole so water will drain back to the low point in the bilge. While I had the router going I eased the sharp top edges, and here's the completed step, ready to be screwed to the keelson:

The day's other project was to make a pattern for the deck coaming. This step is out of sequence, as I won't attach the coaming until the thwarts are done and the frames and inside sides are sealed and painted. But I was looking for jobs to be done while the thickness planer is unavailable.


Monday, Sept. 13. Today started with a surprise call that the thickness planer was repaired and ready to be picked up in Tampa. Several projects had been awaiting that tool's return.

Tomorrow I'll make a decision on a sailmaker, seal the frames with epoxy, measure the thickness of the completed centerboard to know how thick to make the vertical spacers ("headledges") in the centerboard trunk, and screw the mast step in place. I also need to make a router table that I can use outdoors, so I don't fill up the workshop with router shavings. Probably won't get it all done, but so what.

A watcher who shows interest without offering advice. What more could you ask for?
Saturday, September 11, 2010
"Glassing" the Centerboard
Saturday, Sept. 11, 2010. I hope Bin Laden is having a miserable day.
In a small way I sympathize with T. E. Lawrence. After writing Seven Pillars of Wisdom he left the manuscript on a subway and didn't get it back. He wrote it all over again but said the first version was better. I wrote today's post, but instead of publishing it I somehow hit the wrong key and lost what I had written. Compared to Lawrence, not a big deal.
I started today by mixing up some epoxy filler and filled the bolt holes for the mast clamp, some imperfections in the mast, and some spots in the centerboard where the two layers of 12mm plywood had left a crack between them. If I had been thinking, I would also have filled the screw holes in the keelson.
 While the filler was still wet I covered one side of the centerboard with polyester fabric and wet it out with epoxy, wrapping the fabric around the edges. In the picture you can see the marks I made to keep track of the pivot pin location. After the epoxy "kicked" (doesn't take long in 95 degree heat) I turned the board over and covered the other side with a layer of fabric, making a double layer in the edges in most places. When that second layer set up, I put a third layer on the bottom edge of the board for extra protection, since that edge will be the first thing to run aground.
The weave of the fabric is still prominent after the epoxy cures, so there will still be filling and sanding needed before the board is done.
I can foresee it will take a lot of epoxy to cover the bottom and topsides with the same xynole polyester fabric, but the fabric does stretch and bend around corners well, and gives the boat good abrasion resistance. The boat will be strong and durable, but not light. One of the sailmakers I spoke with asked for the boat's displacement, and I had no answer. What does a boat weigh which I haven't finished building yet? The tonnage formula, which has nothing to do with weight, really, workes out to an enclosed volume of 70 sq. ft. and 0.35 tons, or 700 lbs. I know the boat won't weigh that much. A fully decked 19' Lightning with a steel centerboard weigs 700 or 800 lbs. We'll just have to weight (sorry, couldn't resist) and see. I have not taken any special pains to keep weight down. For one thing, I suspect the sail plan was designed for a heavier boat. For another, I don't plan to be picking it up.
I also started making the mast step today. More about that in the next post.
The rudder is moving toward the top of the priority list. I cut out the two outside layers of 6mm plywood last spring, but I need to make a solid wood core with tabs extending out the top which will fit into the tiller.
 One puzzle I did solve was how to mount the rudder to the sternpost. Standard gudgeons are made to either fit flat against a transom or wrap around a keel. Neither would fit on the sternpost. After a lot of searching online I found and bought gudgeons which mount vertically. Now all I need is a rudder to mount them to.
In a small way I sympathize with T. E. Lawrence. After writing Seven Pillars of Wisdom he left the manuscript on a subway and didn't get it back. He wrote it all over again but said the first version was better. I wrote today's post, but instead of publishing it I somehow hit the wrong key and lost what I had written. Compared to Lawrence, not a big deal.
I started today by mixing up some epoxy filler and filled the bolt holes for the mast clamp, some imperfections in the mast, and some spots in the centerboard where the two layers of 12mm plywood had left a crack between them. If I had been thinking, I would also have filled the screw holes in the keelson.

The weave of the fabric is still prominent after the epoxy cures, so there will still be filling and sanding needed before the board is done.
I can foresee it will take a lot of epoxy to cover the bottom and topsides with the same xynole polyester fabric, but the fabric does stretch and bend around corners well, and gives the boat good abrasion resistance. The boat will be strong and durable, but not light. One of the sailmakers I spoke with asked for the boat's displacement, and I had no answer. What does a boat weigh which I haven't finished building yet? The tonnage formula, which has nothing to do with weight, really, workes out to an enclosed volume of 70 sq. ft. and 0.35 tons, or 700 lbs. I know the boat won't weigh that much. A fully decked 19' Lightning with a steel centerboard weigs 700 or 800 lbs. We'll just have to weight (sorry, couldn't resist) and see. I have not taken any special pains to keep weight down. For one thing, I suspect the sail plan was designed for a heavier boat. For another, I don't plan to be picking it up.
I also started making the mast step today. More about that in the next post.
The rudder is moving toward the top of the priority list. I cut out the two outside layers of 6mm plywood last spring, but I need to make a solid wood core with tabs extending out the top which will fit into the tiller.
 One puzzle I did solve was how to mount the rudder to the sternpost. Standard gudgeons are made to either fit flat against a transom or wrap around a keel. Neither would fit on the sternpost. After a lot of searching online I found and bought gudgeons which mount vertically. Now all I need is a rudder to mount them to.
The core of the rudder is just one more part for which I need the thickness planer back from the repair shop. Probably won't run out of projects while I wait for it, but if I do I'll just go sailing. Who's going to fire me?
Friday, September 10, 2010
Fitting the Mast Clamp
To make the rowing thwarts and centerboard trunk I need the thickness planer, which is in for repair at the DeWalt factory service shop in Tampa. They have parts on order, and I'm waiting impatiently to get the tool back.
In the meantime, I've been using the time to shop for needed materials. Yesterday I picked up a variety of epoxy curing agents and the lumber to make centerboard trunk parts, and the bolts to attach the centerboard trunk and the mast step.
Also yesterday the machine shop guy finished the stainless steel clamp to hold the mast tight with the mast thwart, and I picked it up. He did a good job of it, and gave it a dazzling polished finish.
Today I spent time visiting local sailmakers and enjoyed talking with them about the sail I need. The four-sided sail is unusual, and even though Chapelle's sail plan is pretty specific, I had to be careful to explain how it is supposed to work. I got at least three very different sets of ideas and recommendations, to say nothing of different prices. I have a couple of others to hear from, and I'll probably make a decision early next week.
This afternoon I did a little actual work on the boat. I installed, at least dry fit, the mast clamp. It attaches to the aft face of the mast thwart with wing nuts on 5/16" threaded rods which go through holes in the clamp and are sunk into the thwart, . There is not enough room forward of the thwart to fit in bolts long enough to reach all the way through the thwart (would have to be 8") I've given a lot of thought about how to secure the threaded rods into the thwart and be sure they won't pull out. Everything I've read said just bed them in epoxy, which would probably be strong enough.. But what I settled on is much more secure.

I drilled 5/16" holes for the rods horizontally, but then I marked the path of those holes and drilled down from above 5/8" holes to intersect, not all the way through the thwart, but deep enough to slip in nuts for the rods to thread into. Now I can fill the rod holes and the cross holes with epoxy and it's a cinch they aren't pulling out. In the picture, the rod on the left isn't threaded all the way in yet.
Before I drilled holes in the permanently installed thwart, I tried out the idea and practiced on a piece of scrap wood in the workshop.
The mast clamp is part of Chapelle's plan, but he said to sink U-shaped staples into the thwart, to fit through slots in the clamp, and then hold the clamp in place by inserting pegs or pins into the staples. But the staple idea seems even less secure, and in any event there would be no way to adjust the tightness of the clamp against the mast. So I did it this way. Although I might not be the first to think of this solution, I did come up with it independently, and I'm very pleased with myself.
Tomorrow I'll cover the centerboard with polyester fabric and start making the mast step. At least that's the plan. The mast step will not be adjustable, so my plan is to temporarily screw it in place from below. Later on, after the sail is made and the boat is rigged, I'll be able to set the exact right fore-and-aft position for the step. Then I'll bolt it on permanently.
Wednesday, September 8, 2010
Making Thwart Patterns
Wednesday, Sept. 8
The mast thwart is now glued and screwed in permanently, and all the frames are also permanently attached, except the frames adjacent to the two rowing thwarts. Before those frames are attached for good, I need to make the two thwarts they support and the centerboard trunk, which will fit into the two thwarts.
Before I can make the thwarts, I need to get my borrowed thickness planer back from the repair shop and plane the 1 1/2" thwart planks down to their specified 7/8".
 In the meantime I made patterns for the two thwarts. That was a time consuming and exacting job, but I was helped considerably by a timely article in the latest Wooden Boat magazine.

Here's a look at all the frames and the two thwart patterns in place.

I made the centerboard last spring, and also the sides of the centerboard trunk. In order to build the centerboard trunk I need to know how wide the two sides need to be spaced. To measure that I need to first fiberglass the centerboard and the inside faces of the trunk sides. So I ordered fiberglass cloth. Actually, that's the wrong word for it, because the fabric I bought is xynole polyester, a more flexible fabric than fiberglas cloth. I received the fabric yesterday, and today I "glassed" the centerboard trunk sides. I would have also covered at least onc side of the centerboard with fabric, but I ran out of epoxy. It's just as well, because shortly after the epoxy on the trunk sides hardened, a strong thunderstorm rolled in. As I write, it's raining and blowing and lighning is cracking all around. I hope the uncoated undrsides of the trunk sides are not getting too wet but there's nothing I can do about it.
Last week I made a trip to Sarasota to talk with a sailmaker, and am expecting a proposal within the next couple of days. I also have a local metal working shop making a stainless steel strap to clamp the mast in place against the mast thwart.
Before I get much farther along, I'll want to paint the interior while there is still easy access to it. I decided on a paint scheme: The bottom and the lower half of the centerboard will be red antifouling. The topsides will be white. The interior will be a light grey green, with trim painted a darker shade of grey green.
I'm moving into a stage when there are multiple smaller projects going on at once. Some of them are stand-alones, like making oars and spars, but other projects like the thwarts and centerboard assembly depend on each other. Doing things in the right order, and getting the parts and materials I need bought and delivered at the right time makes for an intersting challenge.
This whole thing is really fun. I look forward to sailing the boat; but I consistently underestimate how long each building step will take me. If I were trying to meet a launch deadline or goal, building her it would not be nearly as enoyable.
The mast thwart is now glued and screwed in permanently, and all the frames are also permanently attached, except the frames adjacent to the two rowing thwarts. Before those frames are attached for good, I need to make the two thwarts they support and the centerboard trunk, which will fit into the two thwarts.
Before I can make the thwarts, I need to get my borrowed thickness planer back from the repair shop and plane the 1 1/2" thwart planks down to their specified 7/8".


Here's a look at all the frames and the two thwart patterns in place.

I made the centerboard last spring, and also the sides of the centerboard trunk. In order to build the centerboard trunk I need to know how wide the two sides need to be spaced. To measure that I need to first fiberglass the centerboard and the inside faces of the trunk sides. So I ordered fiberglass cloth. Actually, that's the wrong word for it, because the fabric I bought is xynole polyester, a more flexible fabric than fiberglas cloth. I received the fabric yesterday, and today I "glassed" the centerboard trunk sides. I would have also covered at least onc side of the centerboard with fabric, but I ran out of epoxy. It's just as well, because shortly after the epoxy on the trunk sides hardened, a strong thunderstorm rolled in. As I write, it's raining and blowing and lighning is cracking all around. I hope the uncoated undrsides of the trunk sides are not getting too wet but there's nothing I can do about it.
Last week I made a trip to Sarasota to talk with a sailmaker, and am expecting a proposal within the next couple of days. I also have a local metal working shop making a stainless steel strap to clamp the mast in place against the mast thwart.
Before I get much farther along, I'll want to paint the interior while there is still easy access to it. I decided on a paint scheme: The bottom and the lower half of the centerboard will be red antifouling. The topsides will be white. The interior will be a light grey green, with trim painted a darker shade of grey green.
I'm moving into a stage when there are multiple smaller projects going on at once. Some of them are stand-alones, like making oars and spars, but other projects like the thwarts and centerboard assembly depend on each other. Doing things in the right order, and getting the parts and materials I need bought and delivered at the right time makes for an intersting challenge.
This whole thing is really fun. I look forward to sailing the boat; but I consistently underestimate how long each building step will take me. If I were trying to meet a launch deadline or goal, building her it would not be nearly as enoyable.
Wednesday, September 1, 2010
Making the Mast Thwart and Mast Heel Tenon
Wednesday, Sept. 1
It's a good thing I'm not on a piecework basis. I spent several hours today, primarily just cutting and fitting the mast thwart. The important thing is I got it right. It fits tightly under the sheer clamp, held in place by frames fore and aft and by horizontal stringers let into the frames. All those pieces are done; just needs to be glued and fastened permanently.
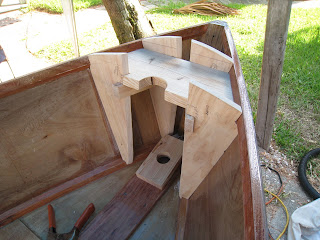

I also cut a tenon in the heel of the mast, to fit into the mast step.
I located the right position for the mast step, to give a 13 degree rake for the mast, as the plans show, and started work on the mast step itself. Once the mast step is bolted in place and the thwart is fastened, no further adjustments will be possible, so I better have it right. Maybe I'll fasten the step with screws so I can move it forward or back a little if sailing trials suggest I need to. Or maybe I'll just bolt it down and trust my work.
Subscribe to:
Comments (Atom)
