
Starting several days ago, I planned to devote one day to sealing many parts with epoxy, and today was the day.
For a long time in the '70's I was a faithful reader of National Fisherman magazine, not because of any interest in commercial fishing, but because at that time the magazine often ran articles about wooden boat design and construction. When it eventually dropped that coverage, I seem to recall that Woodenboat magazine was the heir. Anyway, I remember reading of two brothers named Gougeon in Michigan pioneering the use of epoxy adhesives in boatbuilding. They called their system "wood epoxy saturated technique", later to become a brand name acronym WEST System epoxies. What stuck in my mind was their assertion that if you encapsulate wood in epoxy, it will last virtually forever. I don't know if that claim is true, but I do know it motivates me to seal every wood part of this boat in epoxy before painting in the hope that she will last, certainly not forever, but at least as long as I do.
So today I mixed up batches of 1:1 epoxy specially-formulated to penetrate and seal wood. I sealed the thwarts, the underside of the deck, the mast step, the top side of the sternsheets, the tabs at the top of the rudder, all the deck-coaming support blocks, the ends of the mast, and the forward-most frames which I'd trimmed to fit the coaming. I also sealed the top and bottom edges of the coaming. That type of epoxy is slow to cure, and as I write I'm hoping it hardens in time for me to put all those pieces under cover befor the forecast rain arrives tonight. If they are at least halfway hardened, rain will not hurt them, but may cause a "blush" to form on the surface which will need to be washed off.
I'm having second thoughts about the belaying pins I put in yesterday. The pins are fine, but the location is necessarily cramped. There may not be enough room between the pins and the mast to easily cleat the halyard and snotter. I may end up knocking the pins out, plugging the holes, and putting cleats or belaying pins on the frame just aft of and below the mast thwart, where there is more room.
Tuesday, November 30, 2010
Monday, November 29, 2010
Working on Coaming, Deck Blocks, Belaying Pins, and Red Tape
On the agenda today was to finish trimming and sanding the coaming, making blocks to reinforce the deck and coaming between frames, and make belaying pins to secure the halyard and snotter (a wonderful word: the line holding the sprit out is the snotter.) Actually, that was part of the agenda for yesterday.
I marked the coaming pieces to trim the aft ends to mate up neatly with the transom frame. The starboard coaming hadn't been trimmed to width at all, so I marked it to the designed 4 1/2". After cutting, I sanded the top and bottom edges and rounded them with the router. Because the laminated coaming pieces now have a permanent bend, running it past the router wasn't all that easy. To get them uniformly smooth and round, I followed up with hand sanding. As I was finishing that job, disaster struck. The starboard coaming broke in half at the point of one of the scarphs. I guess there was too much strain on it as I handled it for routing and sanding. As Mozart said when his father died, you can imagine how upsetting that was. Actually I think I grieved for the coaming more. I've put a lot of work into the coaming pieces, and material for a new one would be costly. Here's the plan: when I am ready to finally glue and screw the coaming, I'll see whether the starboard side makes a fair curve if I just epoxy the two pieces together and screw them to the frames. The break is a couple of inches from where the coaming meets a frame, so it will not be easy to put a butt block behind the pieces to support them. We'll just have to see. Worst case, I pay up for new material and use the broken pieces for a pattern, but I hope it doesn't come to that.
The original plans assume the deck is built of 3/4" planks, but my deck is plywood. It's only 6mm (a scant 1/4") thick. It is supported by the sheer clamp on the outside and by frames every 12". But I'm concerned that even though it will be fiberglassed and bonded to the coaming, there is no other support for the deck on the inside edge. So today I made enough blocks about 5" long to screw to the deck and coaming between each frame. Probably unnecessary, but I'd rather have it extra strong. After the deck and coaming are glued and screwed in, I'll also glue and screw the supporting blocks.
The plans specify a 1/2" pin driven through the mast thwart to cleat the halyard. I'll also lead the snotter to the thwart, so I need two such pins. I don't know if the designer meant the pins to be wood or metal, but 1/2" looks puny for wood, so I made 5/8" belaying pins, drilled holes for them in the thwart, and drove them in place. It's a tight fit, so they'll stay in place secured by only the normal sealing and paint. I may add similar belaying pins in the aft rowing thwart, just inside the frames so they won't get in the way. Those could be used to cleat the mainsheet or just snub it. As you can see, there was just enough room for the belaying pins between the mast and the mast clamp bolts.

Today I also measured and marked where the oarlocks should be. On my Gloucester Light Dory they are 12" aft of the aft edge of the rowing thwart, so that's where I'll put them. I'll also put oarlocks for the forward rowing thwart so a crew member could row while another steers. Or both could row. The main reason I wanted to locate the oarlocks is to plan for backing blocks under the plywood deck to hold through-bolts. The forward station oarlocks fall right between two frames, so a backing block is no problem. The aft station is right over a frame, so I'll have to make do with small blocks on each side of the frame. The oarlock sockets are on order.
Next up: apply a penetrating sealer to all these otherwise unprotected pieces I've made, in preparation for painting the inside of the boat.
I've started to look into getting a Federal Hull Identificaiton Number for the boat. Apparently it is a federal requirement for every boat, but administered by the State of Florida, which assigns a number when the boat is first registered. The problem is that registration is not required in Florida for an unpowered boat under 16' in Florida, so I'm not sure whom to call. If I register it in Florida anyway it will cost about $30 per year. Early this year, I registered our canoe in Minnesota in order to paddle the Boundary Waters, and an unpowered boat there only costs $25 for a three year registration. I could also register this boat in Minnesota if I wanted to register it at all, but for that I would need a hull ID #. The reason I'm inclined to battle with the red tape is that without a hull ID# it may difficult for anyone to ever sell the boat because it it can't be shown not to be stolen. I just hope I don't have to come up with receipts for what I've spent building the boat. I don't have them and I don't want to know.
I marked the coaming pieces to trim the aft ends to mate up neatly with the transom frame. The starboard coaming hadn't been trimmed to width at all, so I marked it to the designed 4 1/2". After cutting, I sanded the top and bottom edges and rounded them with the router. Because the laminated coaming pieces now have a permanent bend, running it past the router wasn't all that easy. To get them uniformly smooth and round, I followed up with hand sanding. As I was finishing that job, disaster struck. The starboard coaming broke in half at the point of one of the scarphs. I guess there was too much strain on it as I handled it for routing and sanding. As Mozart said when his father died, you can imagine how upsetting that was. Actually I think I grieved for the coaming more. I've put a lot of work into the coaming pieces, and material for a new one would be costly. Here's the plan: when I am ready to finally glue and screw the coaming, I'll see whether the starboard side makes a fair curve if I just epoxy the two pieces together and screw them to the frames. The break is a couple of inches from where the coaming meets a frame, so it will not be easy to put a butt block behind the pieces to support them. We'll just have to see. Worst case, I pay up for new material and use the broken pieces for a pattern, but I hope it doesn't come to that.
The original plans assume the deck is built of 3/4" planks, but my deck is plywood. It's only 6mm (a scant 1/4") thick. It is supported by the sheer clamp on the outside and by frames every 12". But I'm concerned that even though it will be fiberglassed and bonded to the coaming, there is no other support for the deck on the inside edge. So today I made enough blocks about 5" long to screw to the deck and coaming between each frame. Probably unnecessary, but I'd rather have it extra strong. After the deck and coaming are glued and screwed in, I'll also glue and screw the supporting blocks.
The plans specify a 1/2" pin driven through the mast thwart to cleat the halyard. I'll also lead the snotter to the thwart, so I need two such pins. I don't know if the designer meant the pins to be wood or metal, but 1/2" looks puny for wood, so I made 5/8" belaying pins, drilled holes for them in the thwart, and drove them in place. It's a tight fit, so they'll stay in place secured by only the normal sealing and paint. I may add similar belaying pins in the aft rowing thwart, just inside the frames so they won't get in the way. Those could be used to cleat the mainsheet or just snub it. As you can see, there was just enough room for the belaying pins between the mast and the mast clamp bolts.

Next up: apply a penetrating sealer to all these otherwise unprotected pieces I've made, in preparation for painting the inside of the boat.
I've started to look into getting a Federal Hull Identificaiton Number for the boat. Apparently it is a federal requirement for every boat, but administered by the State of Florida, which assigns a number when the boat is first registered. The problem is that registration is not required in Florida for an unpowered boat under 16' in Florida, so I'm not sure whom to call. If I register it in Florida anyway it will cost about $30 per year. Early this year, I registered our canoe in Minnesota in order to paddle the Boundary Waters, and an unpowered boat there only costs $25 for a three year registration. I could also register this boat in Minnesota if I wanted to register it at all, but for that I would need a hull ID #. The reason I'm inclined to battle with the red tape is that without a hull ID# it may difficult for anyone to ever sell the boat because it it can't be shown not to be stolen. I just hope I don't have to come up with receipts for what I've spent building the boat. I don't have them and I don't want to know.
Sunday, November 28, 2010
A Thanksgiving photo, and Joining the Coaming
#3 son and his family visited on Thanksgiving Day, and my granddaughter showed a great interest in the boat- she knows the way to her granddad's heart. She climbed all over and then settled happily in the sternsheets. Later she insisted in taking her parents and her other grandfather to see and admire the boat. I hope she likes it as well afloat.

Although I didn't reach my goal for today, the final fit of the coaming, what I did get done went very well.
The coaming pieces were epoxy bonded together yesterday. I started today by sanding off the hardened excess goop on the edges and both surfaces.
The main project was to fit the two sides of the coaming together. Instead of just tapering their forward ends to match and screwing them together, I made a rabbeted "stem" piece for the two sides to screw into.

I dressed a chunk of tropical hardwood on the planer, to get four smooth sides square with each other.
 I measured the angle at which the two coaming sides converge, 53 degrees, and set the table saw for half that, 26 1/2 degrees.

and ran the wood block through the saw in each direction, giving me a pair of converging cuts at the right angle.


Finally, I screwed the coaming in place at the transom and at alternate frames. The last steps, which I didn't get to today, will be to trim the bottom edge and round off all the edges with the router.
The today's job took six hours. There's a tradeoff between skill and patience.
Saturday, November 27, 2010
Bonding the Coaming and Deck
The first rainy day in several weeks kept me indoors yesterday; I used the time to plan the best sequence of remaining jobs.
Today, Saturday, I glued and screwed together the four pieces of each side of the coaming- an awkward and messy job I'm glad to have done. After the epoxy set up, I removed the screws.They aren't necessary for strength and, speaking from hard experience, it is much easier to fill screw holes than to grind off the protruding ends of screws.
While I was at it, I glued and screwed the butt straps into the side panels on both sides of the deck. The forward deck piece needs to be attached later.
Those jobs took longer than I expected, but I did have time left to sand the rudder and round its edges with the router in preparation for fabric and epoxy coating. The centerboard has already had that treatment, but I find that it is binding a little in the centerboard trunk so I ground down the high spots on each of its sides. That did the trick: it now slides freely in the trunk. One last finish coat of epoxy resin and it will be ready to paint.
Tomorrow's main goal is the final fit of the coaming. If it works out, it might be worth a photo.
Monday, November 22, 2010
Making the Coaming
The plans call for a 4 1/2" coaming, 3/8" thick. To make it of solid wood, I'd need two planks 15' long, and they would need to be about a foot wide to allow for the curvature of the sheerline: you don't edge-set a plank so wide and so thin. So I am laminating the coaming of two thicknesses of 6mm plywood. Each side consists of four pieces: the inside layer is an 8' piece scarphed to a shorter piece about 6' long. The outside layer is just the reverse. That way the scarphs are kept about 2 1/2'' apart.
On Saturday, before I started on the deck, I wanted to be sure I had enough plywood for the deck and for the coaming so I traced the coaming pattern onto a sheet of plywood. Today I cut out the eight pieces from that panel and made the coaming.
Starting with the port side, I put a 45 degree cut across the ends of the two aft layers, and clamped and tacked them in place. Then I put the forward outside layer in place, with its aft end tucked under the aft piece. I marked where they overlapped and made a matching 45 degree cut in the forward piece. I tacked it in place and repeated the process with the inside forward piece. As a result I had a full side piece assembled. At the bow it extended beyond the centerline, but I'd worry about that later. In the picture below, the scarphs are between the two sets of clamps.

I don't remember, when I made the transom, calculating how high to make the transom top above the deck height, but happily it is 1 3/8", which is just what the plans call for. I checked that I had positioned the coaming high enough that I could trim its top edge to that 1 3/8" height, I also checked that after I'd trimmed the top I would still have enough width to trim the bottom to the 4 1/2" specified width. It was close, but I had room enough both ways. So I screwed the four pieces together to hold them in their relative position and marked the 1 3/8" top line along the outside of the coaming. Then I removed the assembly from the boat and trimmed the top edge close to the cut line, finishing with the handheld electric planer. I scribed the 4 1/2" width to make a bottom cut line, and repeated the cut-and-plane. After the coaming was back on the boat I sighted along the top to make sure it made a fair curve and toched it up with the plane.

I removed the port coaming and repeated the whole process on the starboard side. Now that I knew how, that side went much more quickly. But when cutting the top edge I made the mistake of cutting to the wrong side of the cut line. To compensate for that, I placed a long piece of molding along the top edge, bent it edgewise and clamped it to provide a guide for a fair line to plane to. That seems to have worked satisfactorily.
The remaining step was to reconcile the two sides where they come together at the bow. I trimmed the two pieces to meet by a process of repeatedly marking, sawing and sanding which I do not want to describe or recommend. In the end, the two sides matched up pretty well, but I plan to cut them back further to fit into a rabbeted solid piece. Such a joining piece probably has a proper name, but I don't know what it might be. I have earmarked for that piece a chunk of tropical hardwood given to me by my father long ago. After that piece is made and fit, I will fit the bow piece of deck around it.

Lots of finish work still to be done, but the only other pieces still to make besides that coaming joint are the tiller assembly and the rub rail. From having talked to a specialty lumber shop before, I expect that yellow pine may be the only available material for the rub rail. I may shop for that tomorrow
A Happy Thanksgiving to all! Work will resume Friday.
Sunday, November 21, 2010
Building the Deck
Today's job, making and dry fitting the deck, was like many tasks which I worried about in advance, but which turned out to be pretty straightforward when I set to them. Is there a lesson there?
I laid out plywood pieces, mainly offcuts from previous parts, over the areas to be covered, trimmed their ends to match, and tacked them down.


I laid out plywood pieces, mainly offcuts from previous parts, over the areas to be covered, trimmed their ends to match, and tacked them down.

Then I scribed a line under the deck pieces along the chine, to give me an outside cut line. For the inside cut line, I tacked a long piece of molding, about 1/4"x1 1/2", to all the frames and up against the deck pieces. Then I reached under and scribed a line on the underside of the deck pieces along the molding. That line, of course, would be too far inboard by the thickness of the molding, which I would need to allow for. As a cross-check, I reached further inside where I could and marked along the inside of the molding. I have learned that when you do something blind, the result looks like it is made by a blind man. I learned it from painting, but it applies to scribing cut lines as well. When I pulled the pieces off to cut them, the outside lines, which I could see while drawing them, had turned out fine. And indeed the two inside lines looked like they were drawn by a blind man. Now here was a situation where my career experience could have been put to use. I could have calculated a least-squares line and have known that I had a mathematically optimum cut line. But something told me if I tried that God would punish my pride and I would end up with ruined expensive pieces of plywood. Instead, I just tacked a thin batten along the lines I had drawn, and marked a kind of consensus fair line to cut to. Naturally, that turned out to be right on.

After all the pieces were cut out I tacked them down again, marked match lines, and screwed butt straps underneath. The deck is done to the dry fit stage.

The forward piece, where the two side decks ("washboards") come together near the bow, will need to be cut out; but I won't know by exactly how much until I make the coaming and the piece near the bow where the coaming of the two sides comes together.
I plan to make the coaming tomorrow. It will be laminated of two thicknesses of 6mm plywood. Before shutting down today I tacked the coaming pattern, made previously, and verified I can rely on it as a pattern to cut out the coaming pieces. The coaming itself will provide the fair line on the inboard edge of the deck, to correct for the cutting irregularities I know I have made. Any gap remaining will be filled with thickened epoxy, and fabric will cover the deck and at least the outside of the coaming.
Saturday, November 20, 2010
Sternsheets Done, Starting on Deck
The hard part of making the sternsheets was in the planning. It took a lot of time to figure out exactly where the two cross supports should be and how to attach them there, and a bit more time to calculate how wide each of the six planks should be. but once I had the plan the work went smoothly. I ripped the planks to width, dressed them on the thickness planer, routed the edges round, and screwed them to the supports. The two outside planks were the hardest because they needed to be tapered and also cut out to fit around two frames on each side. Once screwed down, I marked and trimmed and routed the forward ends so they were even with one another. The sternsheets are done, at least to the dry fit level. They'll still need to be taken off, sealed, painted, and screwed back on. I will not glue them down, because I want to be able to get under them for cleaning and painting in the future.

I still had time today to start on the deck, beginning with the piece at the bow which must take a sharp bend to form an unusually high crown. I would have made the deck flatter, but that's what the plans call for. To allow the plywood to bend more than it wants to I cut shallow grooves fore and aft in the foremost few inches of the underside. I screwed that piece down, despite a little groaning from the plywood, and before shutting down for the day I covered that piece with a hot wet towel, to encourage the plywood to get comfortable with the shape. Tomorrow I should be able to get the whole deck roughed in and maybe start on the coaming.

I have decided to press ahead with the final pieces (the sternsheets, deck, coaming, and rub rail) and get them all dry fit. Then I'll disassemble those pieces, paint the inside of the boat, seal the removed pieces, paint them where it will be impossible to reach once they are in their final position, then reassemble them, glass the deck and the outside of the coaming, and do the finish painting. Three reasons: I'm starting to get impatient, and want to see it all together. But more importantly, doing it that way will make it possible to do much of the sealing and painting steps at the same time, and will make it easier to get the finish and assembly steps in the right sequence.
I saw on YouTube a video of a Goat Island Skiff, not too different from this boat, showing its stuff in a strong breeze. Looks lively; I hope not excessively so. My hope is that Tugga Bugga will be a reasonably forgiving boat for grandkids to learn on and comfortable for me to sail for many years in the future. It would be an irony if Tugga Bugga turns out to be fast but tender: our old FJ had those qualities, and that was the reason I sold it and started this project in the first place.
Anyway, it's good to be thinking about what happens after the boat is built, besides sailing her. I haven't finally decided how she will be stored; could be at anchor for short periods, maybe kept on a davit, maybe hauled up on a roller ramp which would need to be built. Will I want a trailer? How about a cockpit cover?
Thursday, November 18, 2010
Right Side Up and Back at Work
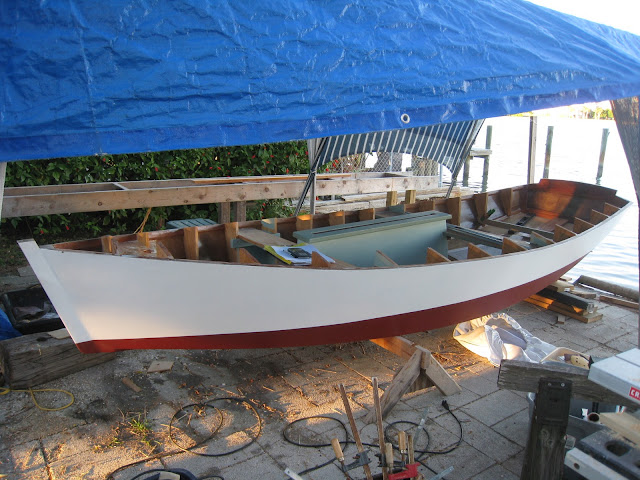
After a ten-day trip out of town, I was able to resume boatbuilding this week.
The bottom and topsides are done, except of course for a little touchup when everything else is complete. On Tuesday, with the help of Mrs. Strongback, I turned the boat over to work on the inside, but got no other work done. The waterline makes it easier to see now how the boat will look in the water.
On Wednesday I got three projects moving along.
After having fiberglassed the topsides, not much excess fabric and epoxy remained along the sheer because I had sliced it off with a razor before it hardened, but what there was I sanded off, leaving the sheer smooth.
I carefully drilled a 1/2" hole through the stem for a painter line, but also low enough to provide a good point from which to tow the boat, if I ever do that. The next time I seal something with epoxy, I'll swab that hole with sealer also.
Before leaving on the latest trip, I had glued and screwed the rudder assembly together. On Wednesday I cut out the finished edge lines with a jigsaw, and tapered the trailing edge, using a power plane and belt sander.
Today, Thursday, I spent a crazy amount of time calculating and measuring for placement of a couple of details. After getting the boat level fore and aft, I started placement of the supports for the stern sheets, the seat at the stern. According to the plans, the sternsheets are not level, but rather slope down from the stern at 3 degrees.
One unusual tool I have is a brass adjustable level which can be set to any angle desired. I had it for years as a desk ornament when I was gainfully employed, but never knew its history or purpose until a customer identified it as a WWII-era artillery clinometer. He explained that it was set for whatever elevation angle was called for by the gunnery officer, and held on the gun's barrel while the gun was raised or lowered until the "clino" showed level. Then it was taken away before the gun was fired, lest it be shaken and broken.
There are not many applications for a level which you deliberately set to an angle other than level, but it was just what I needed to measure the 3 degree slope and mark where the forward support for the sternsheets should be attached to the frames on each side. I dressed a piece of pine with the thickness planer, cut it to the right angle for the flare and narrowing of the sides, and gradually cut it down until it fit against the sides, right at the desired height. I clamped the piece in place.
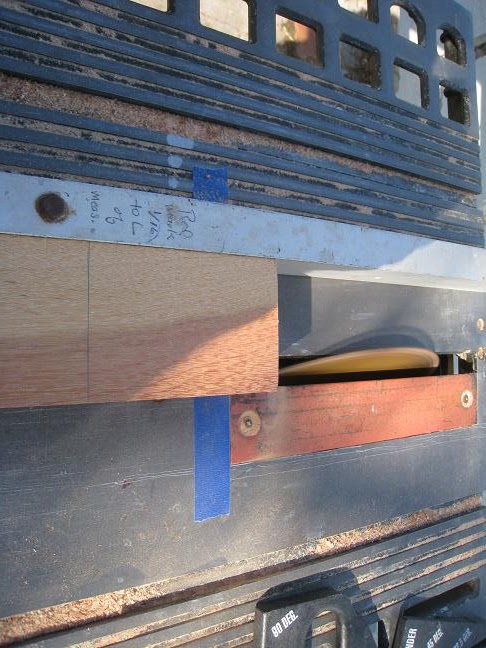
The other angle I fussed over was the placement of the mast step. Once permanently installed, it will not be adustable, so I will screw it down temporarily at my best guess of the right place, and maybe adjust it after the boat is rigged. The mast is to rake aft at 12.25 degrees, according to the plans. So I measured down from the mast thwart to the bottom at that angle, over and over, and marked where the step should initially be. It turns out the step needs to be farther forward that the narrowing of the bow permits, so I trimmed off the forward corners to give it more room.
Here's a picture of my small gains of the last two days. Yes, I know, if I don't pick up the pace I'll grow old and die before the boat is finished:

The bottom and topsides are done, except of course for a little touchup when everything else is complete. On Tuesday, with the help of Mrs. Strongback, I turned the boat over to work on the inside, but got no other work done. The waterline makes it easier to see now how the boat will look in the water.

On Wednesday I got three projects moving along.
After having fiberglassed the topsides, not much excess fabric and epoxy remained along the sheer because I had sliced it off with a razor before it hardened, but what there was I sanded off, leaving the sheer smooth.
I carefully drilled a 1/2" hole through the stem for a painter line, but also low enough to provide a good point from which to tow the boat, if I ever do that. The next time I seal something with epoxy, I'll swab that hole with sealer also.
Before leaving on the latest trip, I had glued and screwed the rudder assembly together. On Wednesday I cut out the finished edge lines with a jigsaw, and tapered the trailing edge, using a power plane and belt sander.
Today, Thursday, I spent a crazy amount of time calculating and measuring for placement of a couple of details. After getting the boat level fore and aft, I started placement of the supports for the stern sheets, the seat at the stern. According to the plans, the sternsheets are not level, but rather slope down from the stern at 3 degrees.
One unusual tool I have is a brass adjustable level which can be set to any angle desired. I had it for years as a desk ornament when I was gainfully employed, but never knew its history or purpose until a customer identified it as a WWII-era artillery clinometer. He explained that it was set for whatever elevation angle was called for by the gunnery officer, and held on the gun's barrel while the gun was raised or lowered until the "clino" showed level. Then it was taken away before the gun was fired, lest it be shaken and broken.
There are not many applications for a level which you deliberately set to an angle other than level, but it was just what I needed to measure the 3 degree slope and mark where the forward support for the sternsheets should be attached to the frames on each side. I dressed a piece of pine with the thickness planer, cut it to the right angle for the flare and narrowing of the sides, and gradually cut it down until it fit against the sides, right at the desired height. I clamped the piece in place.
The other angle I fussed over was the placement of the mast step. Once permanently installed, it will not be adustable, so I will screw it down temporarily at my best guess of the right place, and maybe adjust it after the boat is rigged. The mast is to rake aft at 12.25 degrees, according to the plans. So I measured down from the mast thwart to the bottom at that angle, over and over, and marked where the step should initially be. It turns out the step needs to be farther forward that the narrowing of the bow permits, so I trimmed off the forward corners to give it more room.
Here's a picture of my small gains of the last two days. Yes, I know, if I don't pick up the pace I'll grow old and die before the boat is finished:

Wednesday, November 3, 2010
Hull Finished!
Over the last two days I finished painting the topsides and bottom, so hull is officially complete.


Yesterday I printed the name onto the dull side of photo paper and cut out the letters with an X-acto knife, producing a template which I then traced onto the transom and painted. It makes a good way to put the name on the boat, short of hiring a signpainter. The photo makes it looks crooked, but it isn't.

Today I assembled, glued and screwed the rudder. It's a sandwich, with 6mm plywood the bread and 3/4" pine as the meat. It's messy and ugly; I'll post a photo when it's trimmed and shaped. The rudder will a covering of epoxy and polyester fabric.
I'll be going out of town for ten days starting Friday. When I get back it will be time to turn the boat over and work on finishing the inside. It doesn't hurt to leave the topside paint to cure for a while. It dries fast but takes a month to fully cure. Meanwhile, it is satisfying to have the hull finished. Doesn't look bad, either.
Subscribe to:
Comments (Atom)
