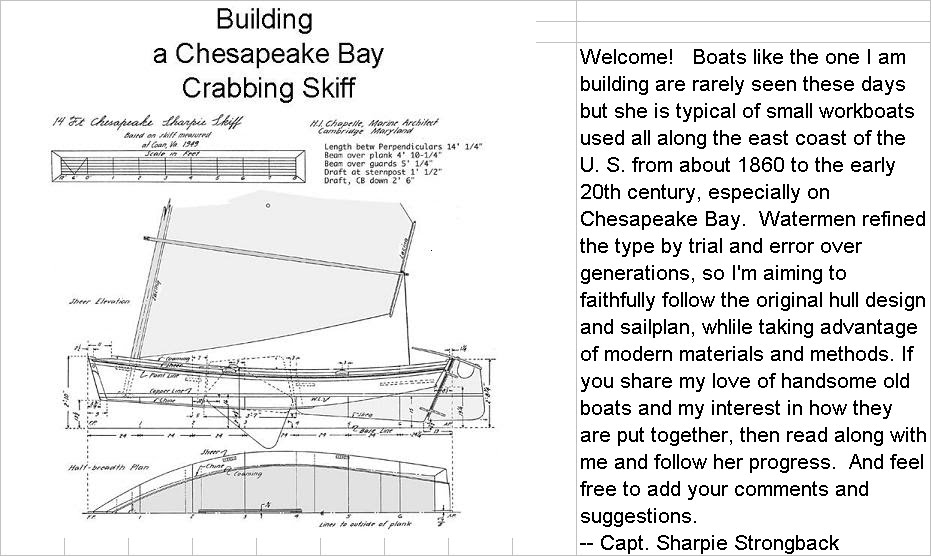
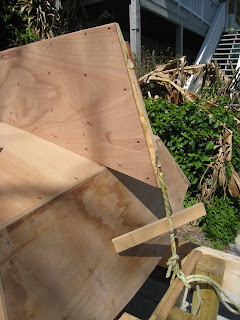
Wednesday, March 31, 2010

A little work done, and mystery ship identified

.

Wednesday, Mar. 31:  I had promised a friend to help him with a home remodeling project today, but he had to delay the starting time so I was able to get in an hour or two of boatbuilding.  I worked with the electric plane to take the sheer down to the right level and the right angle for the deck.  The plane is a hungry and unforgiving tool, and it is easy to cut away too much, so I took it extra slowly and carefully.  I got the starboard side just about done before I was called away.  We are having a stretch of perfect weather: sunny, dry, and in the 70's.  It was a pleasure to be working outside.

We have identified the sailing ship pictured yesterday, thanks to today's newspaper.  It is a replica of Columbus's Pinta.  There is a Columbus Foundation in the Virgin Islands which built a replica of the Nin~a, using trraditional methods and hand tools, and a somewhat less traditionally built replica of the Pinta.  No Santa Maria yet.  They are in town until next Monday, and docked nearby.  We will try to find time to visit them before they leave.


Tuesday, March 30, 2010

Finishing the sheer clamps, And a strange visitor.

.

Tuesday, Mar. 30:  Much of today was consumed with a trip to the Fiberglass Coatings store for a resupply of epoxy and all the fixings, so the only thing I got done was removing the sheer clamps and permanently refastening them with screws and epoxy.  I did such a neat job of it they look just like they did yesterday, so no photo op.

But Mrs. Strongback did snap a picture worth showing.  I was not home, but this was the second of two strange vessels which came by the house:


The other was smaller, and had four masts: lateen rigged on the two after masts and square on the forward two.  I can't recall ever seeing a picture of a ship and rig like this.  It looks somewhat like an arab dhow.  Note that there are no footropes on the main yard.  The large square sail must be furled with brailing lines from the deck.  Or maybe the sail is never set at all.  Maybe a movie prop?

Monday, March 29, 2010

Fitting the sheer clamps

.

Monday, Mar. 29:

 Last Friday, after the epoxy fastening the keelson had cured, I continued work on the inside of the hull.  For reference I marked on the bottom and sides all the design sections, which are spaced every two feet. I marked off where the centerboard trunk slot will be.  The centerboard trunk and the thwarts are the main structural pieces remaining, but I want to get the sheer clamps fitted for two reasons.  They will stiffen the hull sides and support it when I turn it over, which I expect I will be doing often.  And they will provide something to brace temporary supports which will hold the hull to the proper width until the thwarts are put in.  So I cut out two long pieces of clear fir, to serve as the sheer clamps.  Using cutoff pieces, I fiddled with the bevel and rake of the ends until I had patterns for fits against the stem forward and the transom aft.  I also recorded the compound miter angles which produced those patterns. And having learned how easy it is to get confused with miter cuts, I marked the pattern pieces which side is up, and which side of the saw blade to put the piece.  Finally, I cut the bow ends to the right bevels.

Saturday was a no-boatbuilding day, as I helped my son lay out a playground area in his backyard.  Sunday was rainy.

Today, two friends stopped by to "inspect" the boat, and I drafted them to help run the mast blank (a 20' 4x4 of douglas fir) through the thickness planer to smooth the four sides.  Since I bought that piece last December it has been inside the house, and its weight has gone from 95 pounds to 75 pounds, just by drying out.  The finished weight, after it is tapered and sanded, and dries some more, should only be about 30 pounds.  Now when I get a chance I can mark the taper lines on all four smooth sides, and make the initial taper cuts with a skil saw.

After my helper friends left, I continued work on the sheer clamps.  Sunday's rain had washed away my reference marks on the inside, which for some bad reason I had made with a red Sharpie pen.  But the corresponding marks on the outside, which were in pencil, were still there.  So I went around and remeasured and marked new lines on the inside where the sheer clamps should lie.  Then I could proceed with fitting the sheer clamps.  The way to fit a sheer clamp "by the book" which has to fit exactly between the stem and the transom, is to clamp the bow end in place and fasten or clamp it in place along its length as far as possible, letting the other end overhang the transom. When you can't go any farther, mark where the sheer clamp and side line up, and measure how far it is along the side from the mark to the transom, and then remove the piece and cut it to that length.  I didn't have the courage to do that, fearing that somehow it would cut it too short.  Instead, I gradually trimmed the transom end until it fit. 

That necessitated several trial fittings, but peace of mind is worth a little extra work.  When the piece fit and was clamped in place, I screwed it to the side.  Its mate on the port side went much quicker.  At that point I had both sheer clamps dry fitted.  I will still have to remove them and reattach them with epoxy.  But in the meantime they add a surprising amount of rigidity to the hull.


The last thing I did today was make a couple of temporary braces to hold the sides out to the correct width at station 2 (4' aft of the stem) and station 4 (8' aft of the stem).  The desire of all the longitudinals (chine logs, sheer clamps, gripe and keelson) to straighten out have the effect of drawing the ends down and the sides in.  So the temporary braces are needed to push the sides out by about two inches to restore the hull to its proper shape.  I had planned to also put a brace at station 6, but with the other two braces in, the beam there was already just what it should be.


Now I have a rigid hull which will hold its shape until I build the structural pieces inside: the thwarts and the frames and deck.  A nomenclature note about the "deck": it will be only 6" wide.  The plans call it a "covering board", and "washboard" is also a common word for a narrow deck.  But thinking ahead, other people sailing with me might not recognize those words; everyone knows what a deck is, so "deck" it will be.

Next up: the centerboard trunk.

Thursday, March 25, 2010

Finishing fitting the keelson

.


Thursday, March 25:  Today's job was to screw and epoxy the keelson in place, but there were several preliminaries which had to be done first.  I built a low sawhorse to support the boat in place.  Under the stem I set up jack stands with a plank between them.  And I blocked up the skeg to the right height.  I measured and marked carefully where the centerboard slot in the keelson will be, to know where not to put screws. I notched the #4 mold for the keelson so I could clamp it in place to hold the hull shape while fastening the keelson.  And I taped off the area on the inside bottom where the keelson is to lie, to keep the epoxy from making a mess.  Finally I wet out the keelson and bottom with unthickened epoxy, mixed up a thick paste of epoxy and spread it on the bottom, and laid the keelson in place.  I screwed it down, working from the bow aft, and when I reached midships I was able to clamp the mold in place.   The keelson is now laminated to the bottom panels and to the gripe and skeg.  The centerboard trunk will be the last piece of the backbone.  That's it: a day's work, at my pace. One reason each step takes so long is my reliance on epoxy adhesive; it takes a while to mix and apply, and once a piece is fastened with screws and epoxy, I need to leave it alone to cure.  Makes for slow progress, but it's worth it to get a strong and long-lived boat.


Wednesday, March 24, 2010

Starting on the inside- fitting the keelson

.

Wednesday, March 24:  Yesterday I pulled the hull off the molds with the help of two friends and turned her over.  Turns out, the shell of the hull is still very light, so it was no job at all. It was a particular pleasure to see the boat right side up for the first time.  I had other obligations, so I got nothing further done that day.

Today I started work on the inside.  The first order of business is to make and fit the keelson.  I gave the inside a light sanding and carefully marked the centerline.  The bottom is in three pieces, joined by butt straps inside, so I needed to cut away the butt straps where the keelson lies.  Either that or notch the keelson, which would have weakened it.  Cutting the butt straps was awkward, and I made a messy job of it.  Epoxy will hide the poor work.  Then I pulled out my last remaining whole 2x6x16 clear fir board from its home inside the house, and fashioned it into the keelson.  I traced on paper the shape the forward end makes, a chopped-off V, and transferred that to a cutoff piece of 1x6 to make a pattern, adding the flare out and forward to meet the chine logs and the stem. The pattern fit into the boat, so I knew I had the shape right, and duplicated it on the forward end of the keelson piece.  Then I measured the angle the bottom makes with the transom and set the miter saw to that angle.  I gradually cut down the aft end of the keelson piece until, when I pushed down on the keelson to spring it into place, the length was just right.

I unfastened the molds from the strongback and set them aside.  The molds will help hold the hull in the right shape until all the inside structure is build.  I intended to also disassemble the strongback so I would have more room to work.  But I quickly discovered it makes a fine work table; I will leave the strongback up for now at least.

Tomorrown, weather permitting, I will epoxy and screw the keelson in place.  Before I do that, I will notch a couple of molds for the keelson and clamp them in place to hold the hull in the right shape.  I may even over-spring the keelson a bit, so that the lamination of the keelson, bottom and gripe together form a strong piece which will hold its curve and not try to straighten out.  The hull will be stronger if the keel assembly is rigid and not stressing the rest of the hull.


Monday, March 22, 2010

Ready to turn over

.

Monday, Mar. 22:  I gave the exterior of the hull a light sanding, and a sealer coat of penetrating epoxy.  When that has cured, tomorrow, the boat will be ready to be turned over so work on the inside can begin.  That's not to say the outside is finished.  There will be plenty of filling and fairing, a covering of fabric and epoxy, and work around the centerboard slot once that is cut.


The general schedule for the inside is: Brace the sides so the hull holds its shape. 2. The keelson.  3.  Cutting the centerboard slot.  4. The centerboard trunk.  5.  The thwarts. 6.The deck frames and deck.  Somewhere along the line, I need to make the rudder and spars.

Mrs.Strongback commented how pretty the hull looks with a sealer coat on it, and is sorry it can't stay that way. The sealert really brings out the colors in the Okume plywood.  But a boat like this with workboat genes shouldn't be finished bright, and even if I wanted to, by now I have accumulated plenty of dings and mistakes which a bright finish would made conspicuous but which will disappear with filler and paint.

Sunday, March 21, 2010

Inspection day, and another Chapelle 14' sharpie skiff discovered

.

Sunday, March 21:  A rainy no-boatbuilding day today, but two notable events to report.

This morning we received a surprise visit from a young yacht surveyor to inspect Tugga Bugga.  I was relieved that she approved what has been done on the boat to date.  In fact, the second picture below shows she was absolutely delighted with the progress.  I am confident that her approval was entirely objective and not influenced by the fact that Capt. Sharpie is her grandfather.


The other thing to report is that while aimlessly browsing online today I discovered that the Crystal River, Florida chapter of the Traditional Small Craft Assn. is building a boat to the same design, as a group project in cooperation with a local park. That's only a couple of hours away; we'll have to make a trek up to see her. Unlike me, they are building her entirely with hand tools and with traditional materials and methods.  It is interesting and enjoyable to see how differently the same boat can be built.  They are way ahead of me, and will doubless be sailing her before we return from the summer's travels.  Here's a link to their site: http://www.tsca.net/CRBB/sharpie.htm


Saturday, March 20, 2010

Making and fitting the outer stem

.


Saturday, March 20:  A milestone day.

I bought a stick of white oak yesterday for the outer stem.  Today I planed it down to exactly the right thickness, cut out the stem profile, beveled and sanded it, and screwed it in place.  Doesn't sound like much, but consider what tools were used to make a piece just two feet by 3" by 1 3/4": Miter saw, band saw, thickness planer, electric plane, two hand planes, spokeshave, drill press, electric drill, brace and bit, belt sander, and orbital sander.  That's not counting measuring tools or hand sanding tools.  For all that, the project was straightforward and enjoyable.


The outer stem gives the boat a sturdier appearance in keeping with her workboat heritage.  Combined with the inner stem, it makes four to five inches of solid oak out front; in the event of a collision, the other guy will know he has been hit.

I left the top (sheer end) of the stem long, to be trimmed later; I will follow the plans and extend the stem a couple of inches above the deck. I did not epoxy the outer stem on yet, because I want to get it out of the way when I trim the sides to the designed sheer line.

What's the milestone?  The building of the outside of the hull is done. Complete.  I will give it a sealer coat of epoxy and then find some helpers to turn the boat over and start work on the inside. I am looking forward to seeing what she looks like right side up.

Another subject:  I wondered in the last post how boatbuilders can drill a shaft log: a long hole through the length of the keel right through the bottom of the boat to line up exactly with the engine, to take the propeller shaft. It's just an idle thought; thankfully, I won't have to drill such a hole on this boat. But think what a catastrophe it would be if such a hole were crooked by even a fraction of an inch. Well, I looked it up in Chapelle's Boatbuilding.  He describes several alternatives to boring a hole, including making two keel pieces join in a line where the shaft should be and cutting a groove in each of the pieces. As to boring a hole, he cautions, "Perhaps the greatest difficulty in making a shaft log by boring is to avoid fouling keel drifts or bolts. The longer the shaft hole, thre greater the difficulty in boring." He shows an illustration of how to bore such a long hole:


It occurred to me that a laser could be used to check the straightness of a long hole. Chapelle goes on to say, "If the bit and its stock are correctly lined up there should be little trouble in getting a true hole."  Uh huh, if you say so.  Anyway, I'm well satisfied with the small victory of putting 4" screws in the sternpost and stem without getting any of them crooked.

Thursday, March 18, 2010

Fitting the skeg and sternpost

Thursday, March 18: No chance to update the log for several days, but I have made some progress.


Last Saturday I finished rounding and sanding the lower edge of the skeg, and I screwed it in place temporarily. I held it in place with a “Spanish Windlass” (a twisted rope- very effective and precise way to hold a piece in place under tension.) I deliberately left the aft end long.for the moment.


Using the thickness planer on loan from a friend, I planed down the oak piece intended for the sternpost until it was exactly the same thickness as the skeg. I cut out the sternpost and marked the skeg where it needs to be trimmed off to mate with the sternpost.


On Sunday I trimmed off the skeg and permanently attached it with screws and epoxy. . This time I used a double Spanish Windlass, to hold it down, and also straight up. After the epoxy cured, I found that the skeg was a little out of plumb; I will have to correct that when I mount the sternpost.


We had houseguests for a couple of days, and the next chance at boatbuilding was Tuesday afternoon. The entirety of the work I got done that day was to drill three screw holes, but it took me about three hours to do it! The sternpost is 4 ½” wide. So how do you fasten it on edge to the aft end of the keel. The traditional method would be to drill long holes in the sternpost and skeg and drive long iron “drifts” through both. Forget that; I haven’t the tools, materials or technology to do that. What I finally did was buy the longest screws I could find (4”), drill ½” holes most of the way through the aft side of the sternpost and smaller pilot holes the rest of the way through. Then when the screws are driven in, there will be about 2 ¾” of threads left to go into the skeg. Simple enough in concept, but the holes had to be drilled very carefully to keep them on center. 4” is a long way to drill straight. By setting up a makeshift guide for the drill bits, I was able to get the exit holes centered just right.


How in the world do boatbuilders drill holes for propeller shafts, sometimes 6-8 feet long or more, and not have the hole come out somewhere far from intended? I have no idea.


Wednesday was taken up with other activities, but today, Thursday, I wrapped up this phase of the project. I planed and sanded the mating edges of the skeg and sternpost so they made a satisfactory joint. I drilled pilot holes into the skeg to match the screw holes in the sternpost, and screwed the sternpost to the skeg. To straighten it for being out of plumb, I used a Spanish Windlass once again to pull it in line, and screwed through the transom into the sternpost where it lies along the transom, right on the center line where it should be. Everything checked out so I took out all the screws, applied epoxy and screwed the sternpost on permanently. One last straightening adjustment needed to be done. Sighting along the side of the sternpost and the side of the skeg, they were a little out of plane. So I used a clamp to twist the sternpost straight. When the epoxy sets, I should have a straight, strong skeg and sternpost. I will add more large screws from the inside into the skeg after I put in the keelson inside. The only jobs remaining on the skeg and sternpost will be to round off the bottom edge of the sternpost in line with the skeg, and to epoxy ½” dowels into the screw holes. The next step will be to add an outer stem. We are approaching the time when the exterior of the hull is done. I think I’ll seal it with a penetrating coat of epoxy before turning it over and working inside.


Thursday, March 11, 2010

fitting the skeg.


Tuesday, Mar. 9: I trimmed the skeg to the design lines, and rounded the lower edge with a router today. The aft edge of the skeg was left long so that the sternpost, which forms the aft edge, can be used as a guide to trim it. But then I had to stop work for a few days. Candidly, I was under doctor’s orders to take it real easy this week, and although you can see for yourself I wasn’t doing much, apparently it was too much. I am anxious to get back at it, and should be able to resume work Friday or Saturday.
The next step will be to fit the sternpost and skeg to the boat.
I have decided not to fiberglass the outside of the boat before turning her over and working inside, as I had originally intended. There will be many interior pieces mounted by screws, maybed even some bolts, through the topsides and the bottom; and I want the fabric to be on top of everything.

Monday, March 8, 2010

Back at it


After a four-day enforced layoff for medical reasons, I resumed boatbuilding work today, and got two good projects done; a big one and a little one.

I fabricated the skeg. That was the big job, but it went smoothly. The skeg is built in three layers. 1x6 pine boards make up the core, and a layer of 6mm plywood is epoxied and screwed to each side. After lofting the design shape of the skeg on one plywood panel, I cut out the rough shape, leaving 1" all around to be trimmed off later. That gave me one side of the skeg and a pattern for the rest. I stacked the 1x6's edgewise, laid the pattern over them, traced the outline, and cut the boards to match. I also used the pattern piece to mark and cut the other plywood panel. The boards were coated with epoxy, with thickened epoxy for adhesive between their edges. The pattern plywood panel was also coated with epoxy and then laid on top of the boards. A few small nails held the boards in place underneath. Then I drove 1" bronze screws all around the edges to make a strong epoxy bond. Once that was done, I flipped the piece over and attached the other plywood panel the same way.

After the epoxy cures overnight, I will trim the entire skeg to the design line on the top and bottom edge. I'll dry fit it to the boat and see where the aft edge needs to be trimmed to match up with the sternpost. I'll trim the skeg, permanently install it, make the sternpost and attach it to the transom and the skeg. Then the skeg and entire exterior will be done. The only other thing before the exterior is ready for fiberglassing is to make and attach the outside stem liner.

I also finished the edges of the centerboard today. All edges except the trailing edge were rounded over with the router to leave a 5/8" flat on the edge. The trailing edge was tapered with an electric plane followed by sanding, to leave a 1/4" radius on the edge. If boat speed were the only consideration I would have similarly sharpened the leading edge of the centerboard. But that would have left it vulnerable to damage whenever the boat is beached or run aground, both of which I plan to do a lot. So the exposed edge of the centerboard will be trimmed with a 5/8" brass oval strip, and I finished the edge of the board to that size. The centerboard is now finished and ready for fiberglassing.

The one previous time I built a boat I used "marine grade" fir plywood and was dissatisfied with its quality during construction and in the years since. So this time I went for the best marine grade Okume plywood at twice the cost. I thought the grade standard called for no voids in the interior layers. But planing down the trailing edge of the centerboard revealed that the plywood does have some voids. I am surprised, and not happy about it. Nevertheless, my intention is that all wood surfaces except the spars be encapsulated in epoxy. So the boat should be strong and tight, and with normal maintenance it should last a very long time.

Wednesday, March 3, 2010

More prep work on the skeg


I said a couple of days ago that making a pattern for the skeg would be easy. By now, I should have known better. Easy, maybe, if done right. Quick, no. Rather than make a template for the skeg, as I did for the centerboard, I'm lofting it directly onto a sheet of plywood which will become one of the sides of the skeg; one slice of bread in the sandwich, if you will. Since the drawing requires a level baseline for reference to transfer the measurements from the plan, doing the drawing directly on the plywood will leave more scrap than doing the drawing on paper or thin strips of wood and tracing the pattern onto plywood, but this way skips one step. That's one less chance for a mistake or inaccuracy. In a couple of hours of work I got the skeg profile drawn and double checked. Then I went to Home Depot and bought enough 1x6 clear yellow pine to make the filling for the sandwich. That was today's work.


Here's the plan for the skeg: 1. Rough cut the shape of the skeg drawn on the plywood panel. 2. Lay the rough panel over the 1x6's and mark them to match the rough cut plywood panel. 3. Lay the three 1x6 boards together edgewise on a sheet of plastic (visquine) with the untrimmed second plywood panel underneath. 4. Epoxy the 1x6's together along their edges and clamp them. 5. Epoxy the rough cut panel onto the 1x6 filler boards, and screw it down with 1" wood screws to get a real good epoxy bond. If the screws are countersunk to just below the surface of the plywood, they may just barely show out the bottom of the 1x6 boards. If so, the worst that happens is they pierce the plastic (which is there to keep the boards from being glued to the floor or the panel underneath) and maybe make pinholes in the plywood panel underneath. After the epoxy sets up, I'll flip it over, peel off the plastic and epoxy and screw the other plywood panel to the other side of the filler boards. Then I'll cut out the whole assembly to the lines drawn on the top panel.


The skeg is to be integrated with the sternpost which will be fixed to the transom and extend to the bottom of the skeg. I can't count on the transom rake angle on the hull as built matching exactly the designed angle. In fact, I'd lay odds it is off by a degree or two one way or the other. That would make the sternpost not match up witht he skeg neatly. So I'll make the skeg a little long towards the stern, screw it onto the boat for a dry fit, extend a straightedge down from the transom, and mark exactly the line the aft end of the skeg should be cut to. The sternpost will be fixed to the rest of the skeg with long screws and epoxy, and the skeg will be fixed to the hull the same way. After the keelson is installed inside the boat, I'll put additional larger screws down through to affix the skeg. The skeg, sternpost and everything else on the hull's outside will be fiberglassed together.


One picture I want to insert shows the gripe, which I finished a couple of days ago. If you look close, or maybe even if you don't, you can see the assymetry I mentioned and lamented. My brother suggests evening it up with a router; not a bad idea.


A couple of technical changes I made to this blog. One allows anyone to comment, whether they have signed up with blogspot or not. The other is a hit counter. Surprisingly, it shows about ten hits a day. I don't have that many children that I know of, but whoever you are, you are welcome. If you are following the boat's progress and have any comments or suggestions, they will be appreciated. Don't be shy.


I will be having a medical refurbishment tomorrow, and I may have to lay off boatbuilding for a few days. Maybe I'll write up what I know about the boat's ancestry.

Tuesday, March 2, 2010

Working on skeg pattern


I only had about an hour available today, so not much boatbuilding got done. The weather wouldn't permit me to work outside, so I brought a skeg-sized panel of plywood on the floor inside and began to draw the outline for the skeg. Not much of a photo op, but anyway...
The skeg will be made like a sandwich, with 3/4" thick wood between two layers of 6mm plywood. That will give it a hefty 1 1/4" thickness, and I'll be able to screw into the solid 3/4" layer edgewise to make a secure fastening to the hull, besides the epoxy adhesive. Like the rest of the hull exterior, it will be fiberglassed.

Tomorrow promises to be good weather, but most of the skeg assembly will be inside work anyway.

Monday, March 1, 2010

Normative boatbuilding

Monday, Mar. 1: Not much time to work on the boat today, but a couple of things did get done.

I trimmed off the gripe where it had overlapped the bow. I was sorry to see that I had installed it just a little off center, so when it was trimmed even with the sides of the boat and the stem, it makes a wedge shape which is a little lopsided. Nothing to do about it, it won’t have any functional effect, and no one will see it unless they get under the boat. But I still don’t like it.

I also made a pattern for the top edge of the skeg, where it meets the boat’s bottom. As I mentioned yesterday, that pattern had to be made normatively, rather than positively: (Sorry, I couldn’t resist saying that. I had an economics professor who taught me that expression, and have never before had a chance to use it). I’ll make the skeg match up with the shape of the bottom as it should be, instead of how it is right now, under strain from some but not all of the structural pieces are already installed. The rest of the pattern for the skeg should be easy: the bottom edge is a straight line to where it intersects with the sternpost.

A tour boat came by about the time I was cleaning up the work site, and I could hear the guide on his loudspeaker. "That guy has been working on building a boat for a long while now. He's always out there." Hmm. I'm a tourist attraction, now?