.
Monday, Mar. 29:
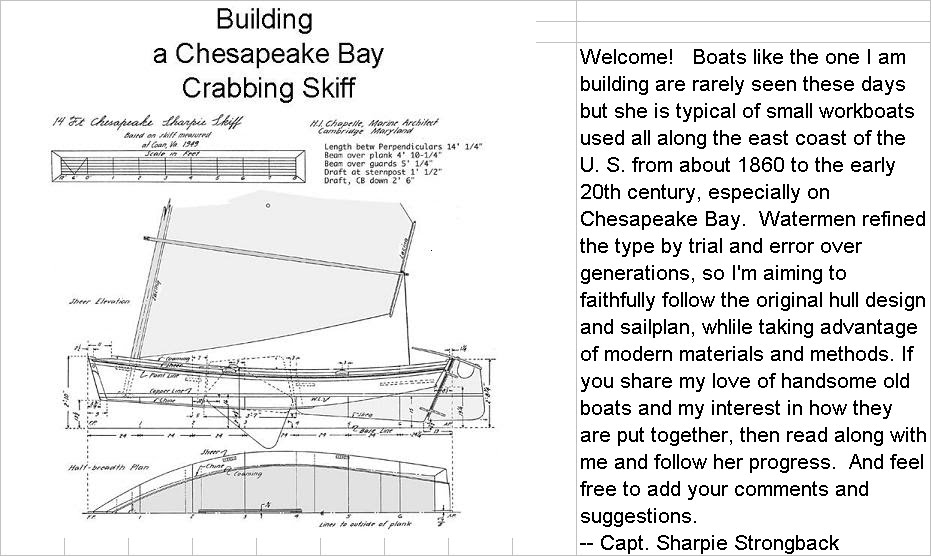
Last Friday, after the epoxy fastening the keelson had cured, I continued work on the inside of the hull. For reference I marked on the bottom and sides all the design sections, which are spaced every two feet. I marked off where the centerboard trunk slot will be. The centerboard trunk and the thwarts are the main structural pieces remaining, but I want to get the sheer clamps fitted for two reasons. They will stiffen the hull sides and support it when I turn it over, which I expect I will be doing often. And they will provide something to brace temporary supports which will hold the hull to the proper width until the thwarts are put in. So I cut out two long pieces of clear fir, to serve as the sheer clamps. Using cutoff pieces, I fiddled with the bevel and rake of the ends until I had patterns for fits against the stem forward and the transom aft. I also recorded the compound miter angles which produced those patterns. And having learned how easy it is to get confused with miter cuts, I marked the pattern pieces which side is up, and which side of the saw blade to put the piece. Finally, I cut the bow ends to the right bevels.
Saturday was a no-boatbuilding day, as I helped my son lay out a playground area in his backyard. Sunday was rainy.
Today, two friends stopped by to "inspect" the boat, and I drafted them to help run the mast blank (a 20' 4x4 of douglas fir) through the thickness planer to smooth the four sides. Since I bought that piece last December it has been inside the house, and its weight has gone from 95 pounds to 75 pounds, just by drying out. The finished weight, after it is tapered and sanded, and dries some more, should only be about 30 pounds. Now when I get a chance I can mark the taper lines on all four smooth sides, and make the initial taper cuts with a skil saw.
After my helper friends left, I continued work on the sheer clamps. Sunday's rain had washed away my reference marks on the inside, which for some bad reason I had made with a red Sharpie pen. But the corresponding marks on the outside, which were in pencil, were still there. So I went around and remeasured and marked new lines on the inside where the sheer clamps should lie. Then I could proceed with fitting the sheer clamps. The way to fit a sheer clamp "by the book" which has to fit exactly between the stem and the transom, is to clamp the bow end in place and fasten or clamp it in place along its length as far as possible, letting the other end overhang the transom. When you can't go any farther, mark where the sheer clamp and side line up, and measure how far it is along the side from the mark to the transom, and then remove the piece and cut it to that length. I didn't have the courage to do that, fearing that somehow it would cut it too short. Instead, I gradually trimmed the transom end until it fit.
That necessitated several trial fittings, but peace of mind is worth a little extra work. When the piece fit and was clamped in place, I screwed it to the side. Its mate on the port side went much quicker. At that point I had both sheer clamps dry fitted. I will still have to remove them and reattach them with epoxy. But in the meantime they add a surprising amount of rigidity to the hull.
The last thing I did today was make a couple of temporary braces to hold the sides out to the correct width at station 2 (4' aft of the stem) and station 4 (8' aft of the stem). The desire of all the longitudinals (chine logs, sheer clamps, gripe and keelson) to straighten out have the effect of drawing the ends down and the sides in. So the temporary braces are needed to push the sides out by about two inches to restore the hull to its proper shape. I had planned to also put a brace at station 6, but with the other two braces in, the beam there was already just what it should be.
Now I have a rigid hull which will hold its shape until I build the structural pieces inside: the thwarts and the frames and deck. A nomenclature note about the "deck": it will be only 6" wide. The plans call it a "covering board", and "washboard" is also a common word for a narrow deck. But thinking ahead, other people sailing with me might not recognize those words; everyone knows what a deck is, so "deck" it will be.
Next up: the centerboard trunk.
Monday, March 29, 2010
Subscribe to:
Post Comments (Atom)


No comments:
Post a Comment